|
Step 1. Make sure the LoRaWAN Gateway is already connected to power and internet as per User Guide / Manual.
|
|
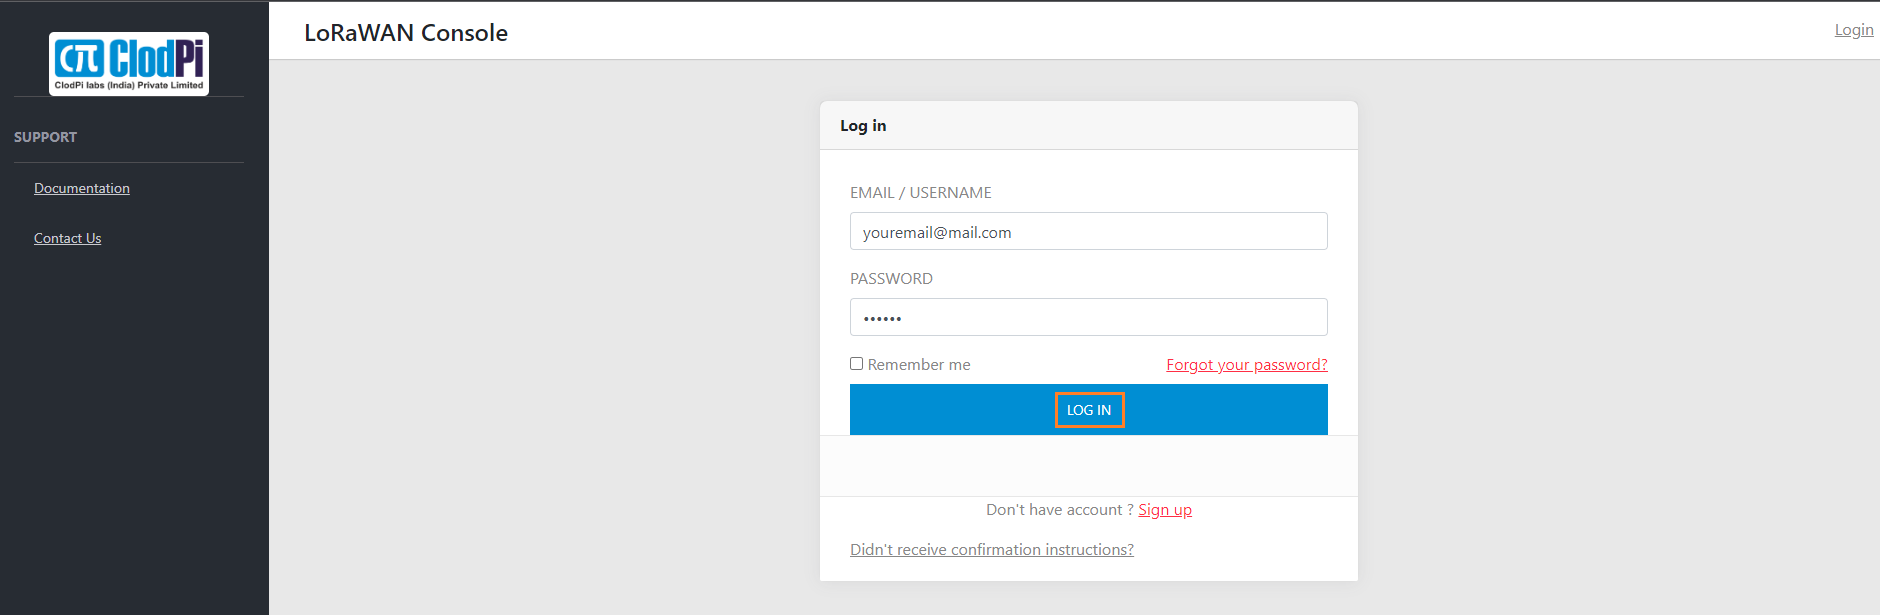
Step 2. On your mobile / computer, open a browser and navigate to https://console.clodpi.io/
|
|
|
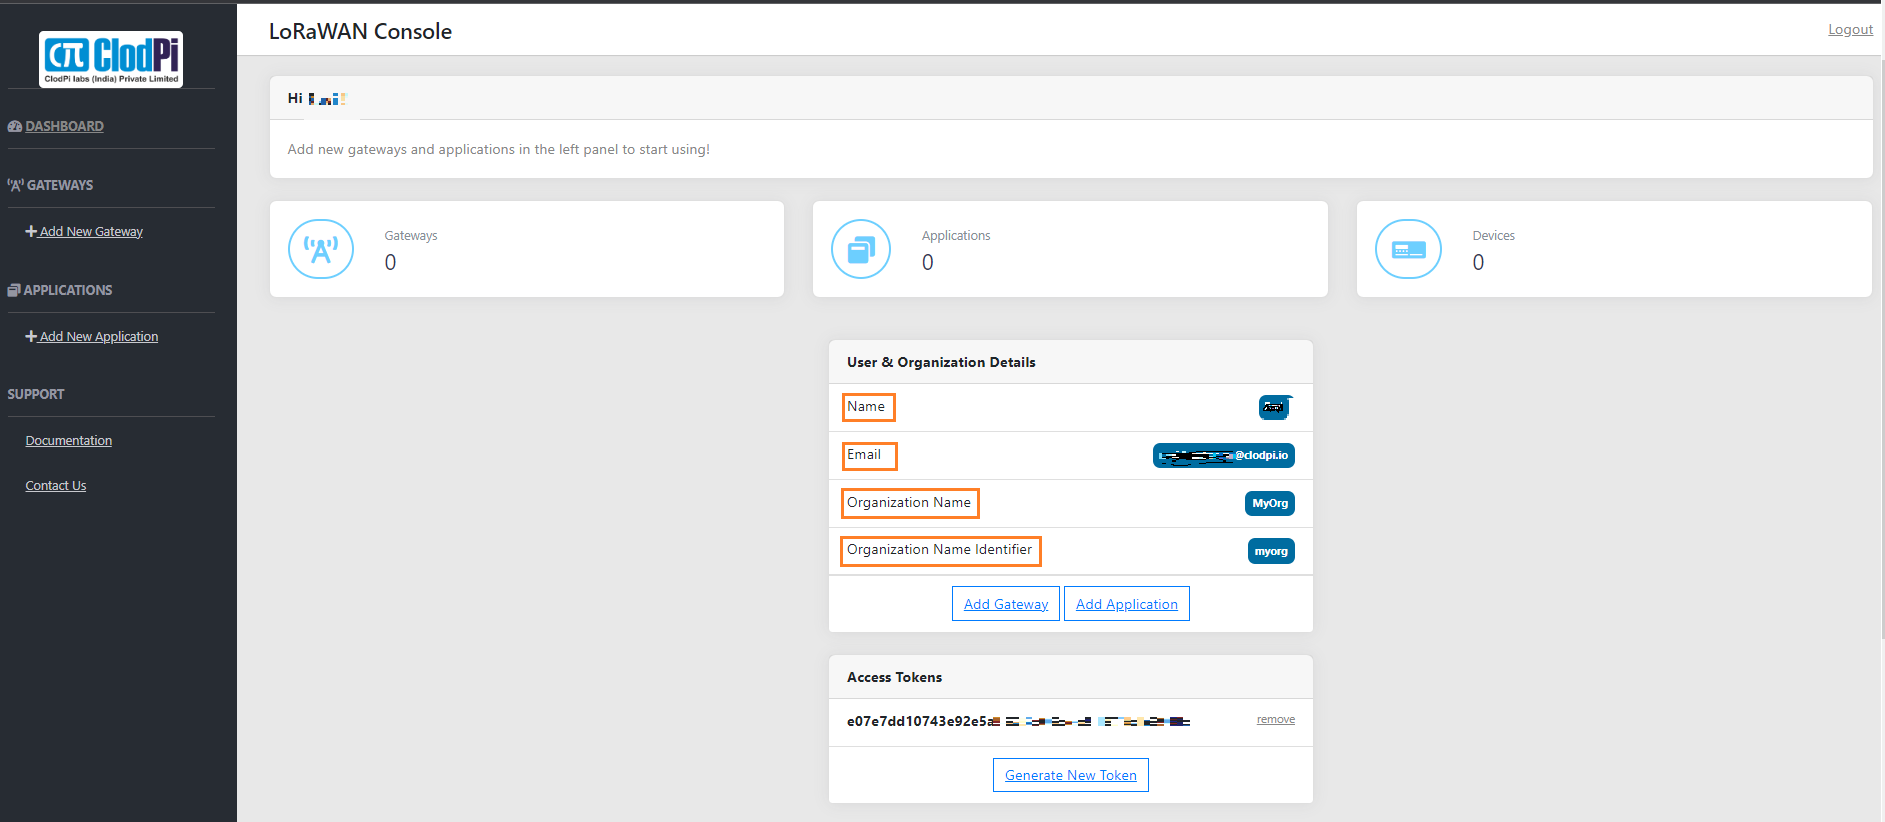
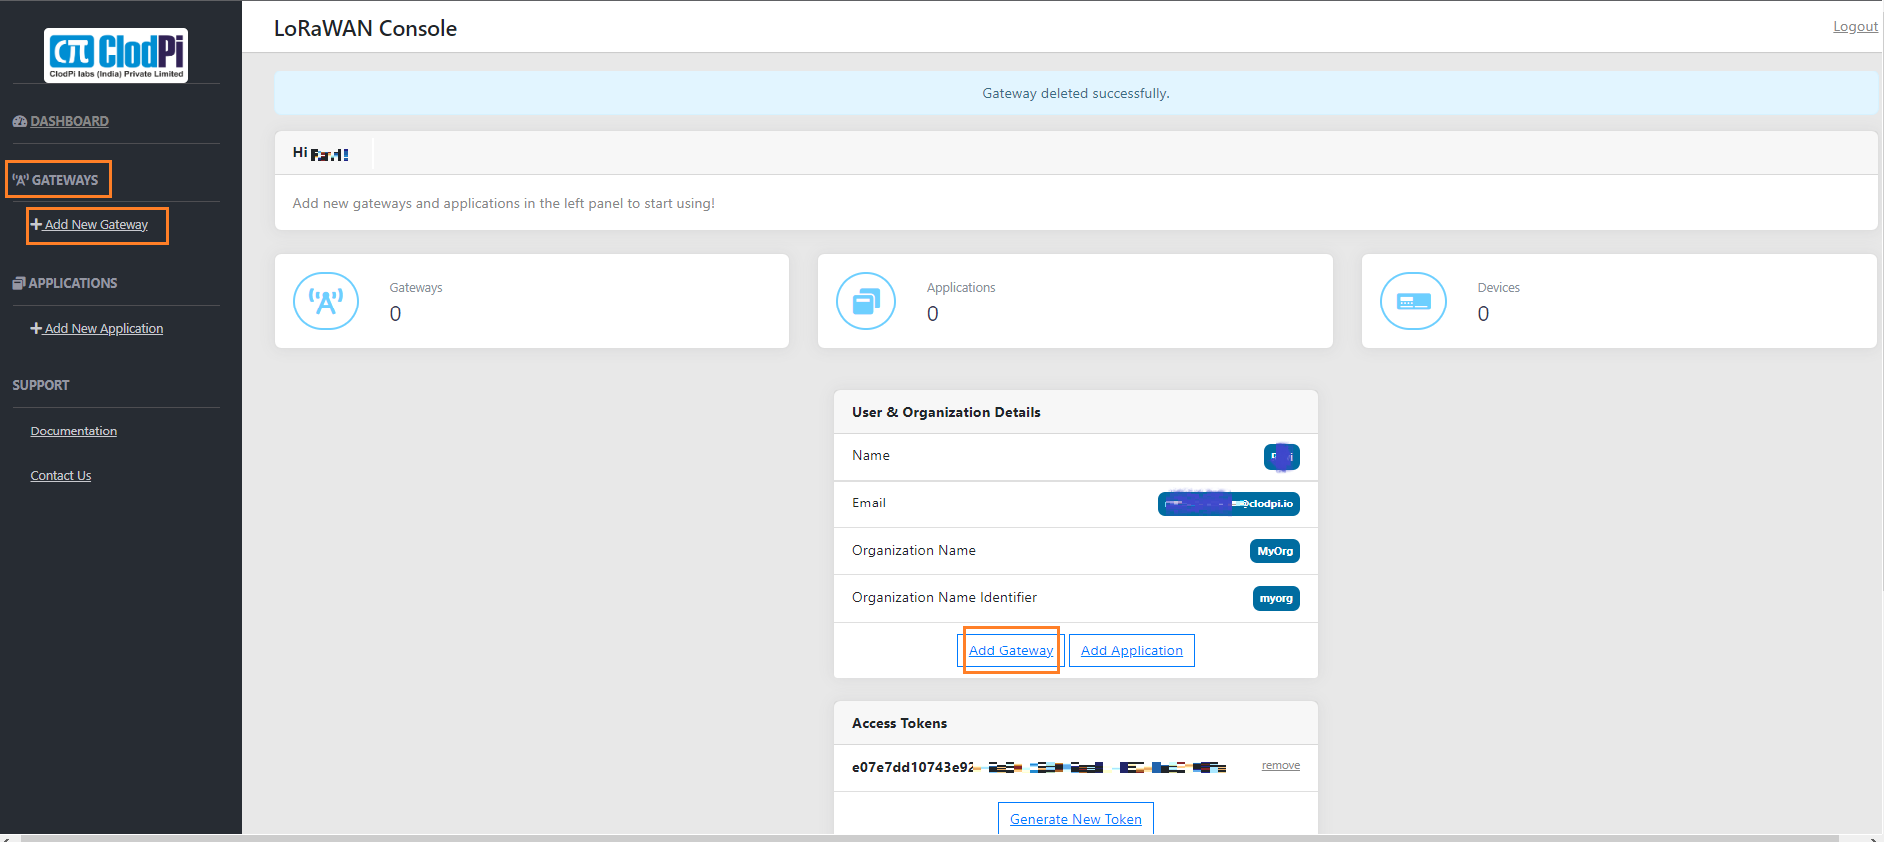
Step 3: If visiting the page for the first time - proceed with Sign up process. Existing user can proceed with Login options.
PS: Make note in local copy: Name, Organization Name, Organization Name Identifier and Access Token. These details are needed for Gateway registration / configuration process.
|
|
|
Step 4: On laptop / mobile
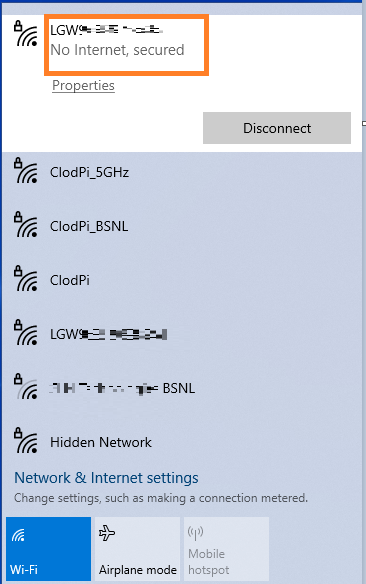
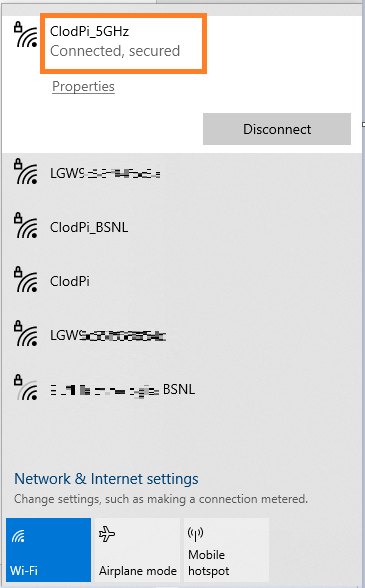
Step 5: Go to WiFi option. (For illustration purpose, a laptop is used)
Step 6: WiFi > LGWxxxxxxxxxxxx > Select
Step 7: Enter password: 87654321
PS: This is default password. User can change this password.
|
|
|
Step 8: Click Connect. *This will connect the device (laptop / mobile) to the same network as that of the Gateway.
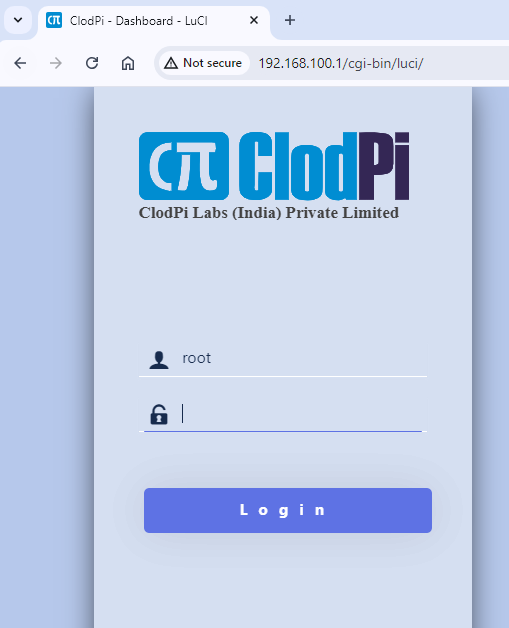
Step 9: In the laptop / mobile, open a browser and navigate to http://192.168.100.1/
Step 10: On Login page,
-
Username: root
-
Password: pass1234
-
Click: Login button
|
|
|
Perform below steps if using ClodPi Labs LoRaWAN Network Server (LNS Console)
Step 11: To configure the gateway, navigate to LoRaWAN > Connection Mode
Step 12: To configure the gateway, navigate to LoRaWAN > Connection Mode
- Click: “Mode” drop down
- Select: Clodpi Connector
- Click button: Save&Apply
A message will be displayed “Configuration changes applied”.
|
|
|
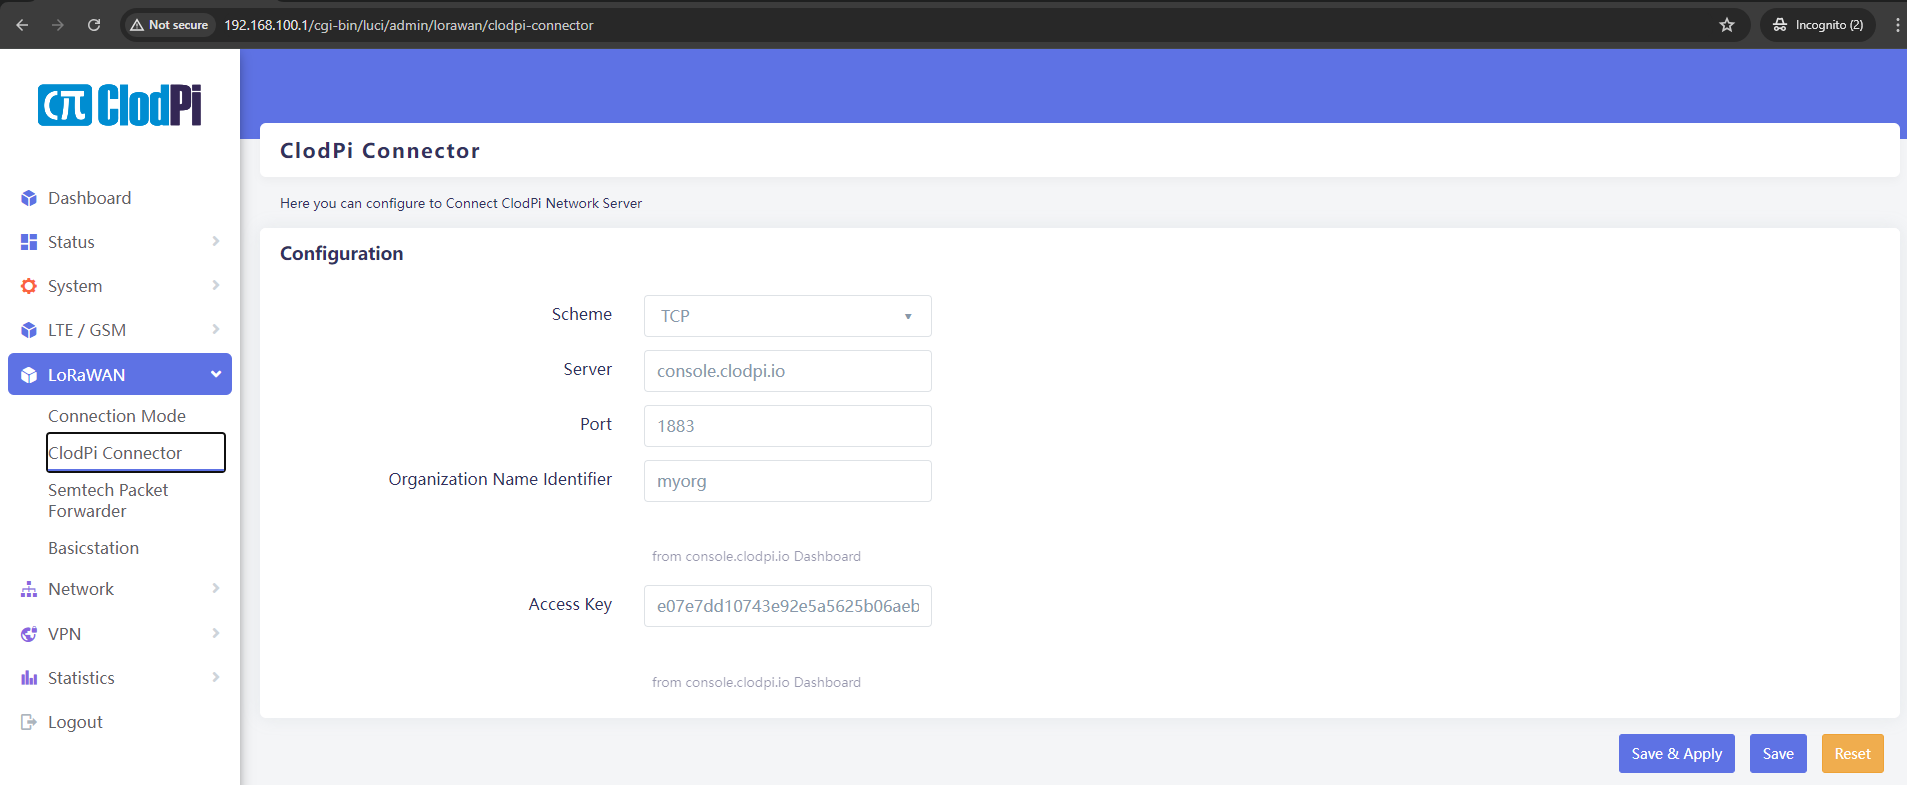
Step 13: Navigate to LoRaWAN > ClodPi Connector
At LoRaWAN Clodpi Connector > Configuration: Enter / Select the value as prescribed in below steps
|
|
| Scheme |
select “TCP” |
| Server |
enter “console.clodpi.io” if using LoRaWAN Network console of ClodPi Labs |
| Port |
1883 (default value) |
| Organization Name Identifier |
enter Organization Name Identifier from your profile (Refer Step 3). The field is case sensitive, make sure to enter exactly the same value. |
| Access Key |
enter your Access Token (Refer Step 3) |
Note: Keep all others values as is. DO NOT make any other changes.
- Click button: Save&Apply
Note: A message will be displayed “Configuration changes applied”.
|
|
|
Perform below steps if using LoRaWAN Network Server (LNS Console) other than that of ClodPi Labs
|
|
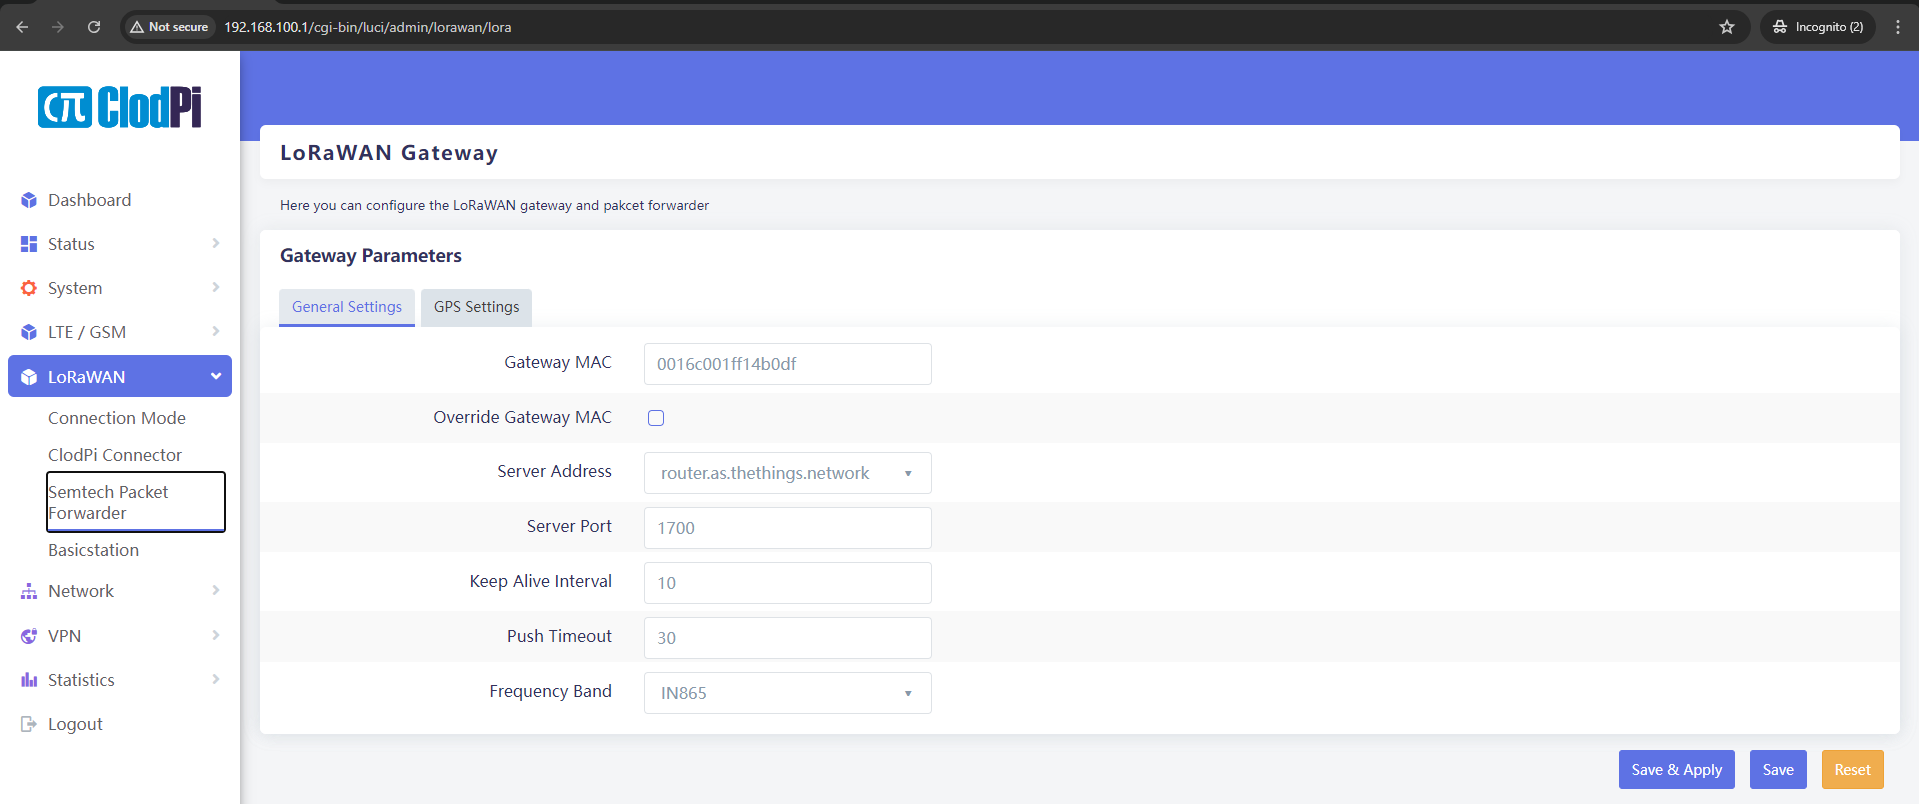
Step 14: To configure the gateway, navigate to LoRaWAN > Semtech Packet Forwarder
- At LoRaWAN Gateway > General Settings tab: Enter / Select the value as prescribed in below steps
|
|
| Gateway MAC |
default value will be displayed. Make note of the value. This information is needed later while adding the gateway to the console. |
| Override Gateway MAC |
keep the check box unselected |
| Server Address |
Click the drop down and scroll down > select any of the listed options OR scroll down till last and type in the Server Address of your LNS instance |
| Server Port |
1700 (default value) |
| Keep Alive Interval |
10 (whole number, value denotes time in seconds, default is 10 seconds, it can be customized as per the need.) |
| Push Timeout |
30 (whole number, value denotes time in seconds, default is 30 seconds, it can be customized as per the need.) |
| Frequency Band |
Select a relevant Band from the listed value OR scroll down till last and type in the relevant frequency band. |
Note: Keep all others values as is. DO NOT make any other changes.
|
|
|
Step 15 : Scroll down the page to the bottom. Click button ‘Save & Apply’.
Note: This will save the Gateway configuration details.
|
|
Next: Login to ClodPi Labs Console and Add the gateway
|
|
Step 16: Go to device WiFi option > change to the main internet option and connect.
|
|
|
Step 17: On laptop / mobile device, open a new browser
Step 18: Navigate to https://console.clodpi.io/
Step 19: After Login, navigate to Gateways > Add New Gateway
|
|
|
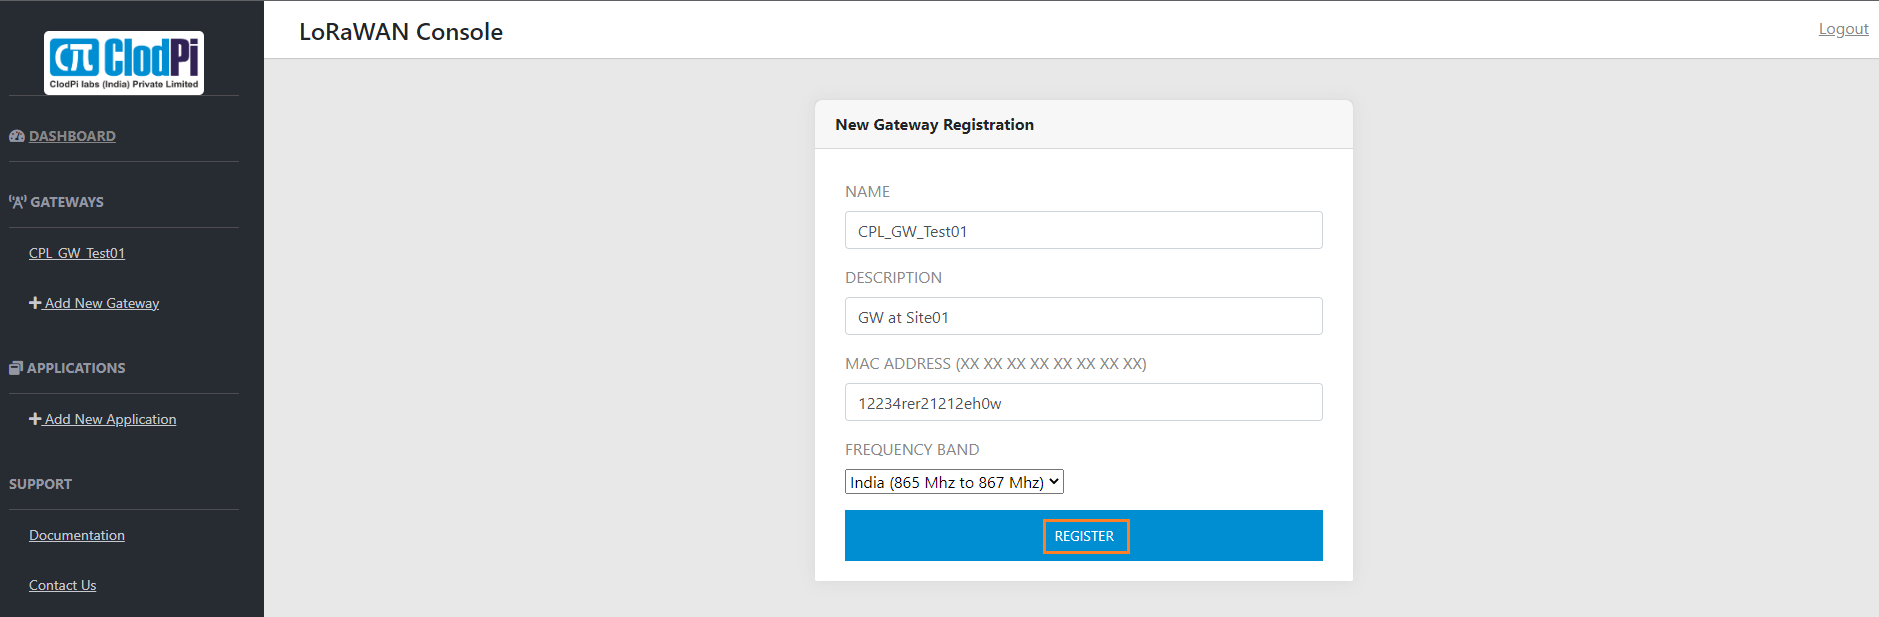
Step 20: On 'New Gateway registration, screen, provide below details:
|
|
| Name: |
provide a meaningful unique identifiable name for the gateway |
|
Description: |
provide a meaningful description for the gateway |
| MAC Address: |
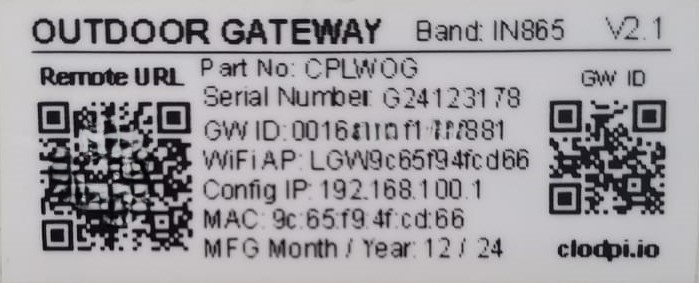
enter the MAC Address of the Gateway. This is provided by the Gateway manufacturer - a sticker on the Gateway has the details. Refer to “GW ID” label on the sticker. |
| Frequency Band: |
Select as per applicable for the base country. Example: For India, it will be India (865 MHz to 867 MHz) |
|
|
|
Step 21 : Click: ‘Register’.
Note: Gateway created successfully message will be displayed
|
|
|
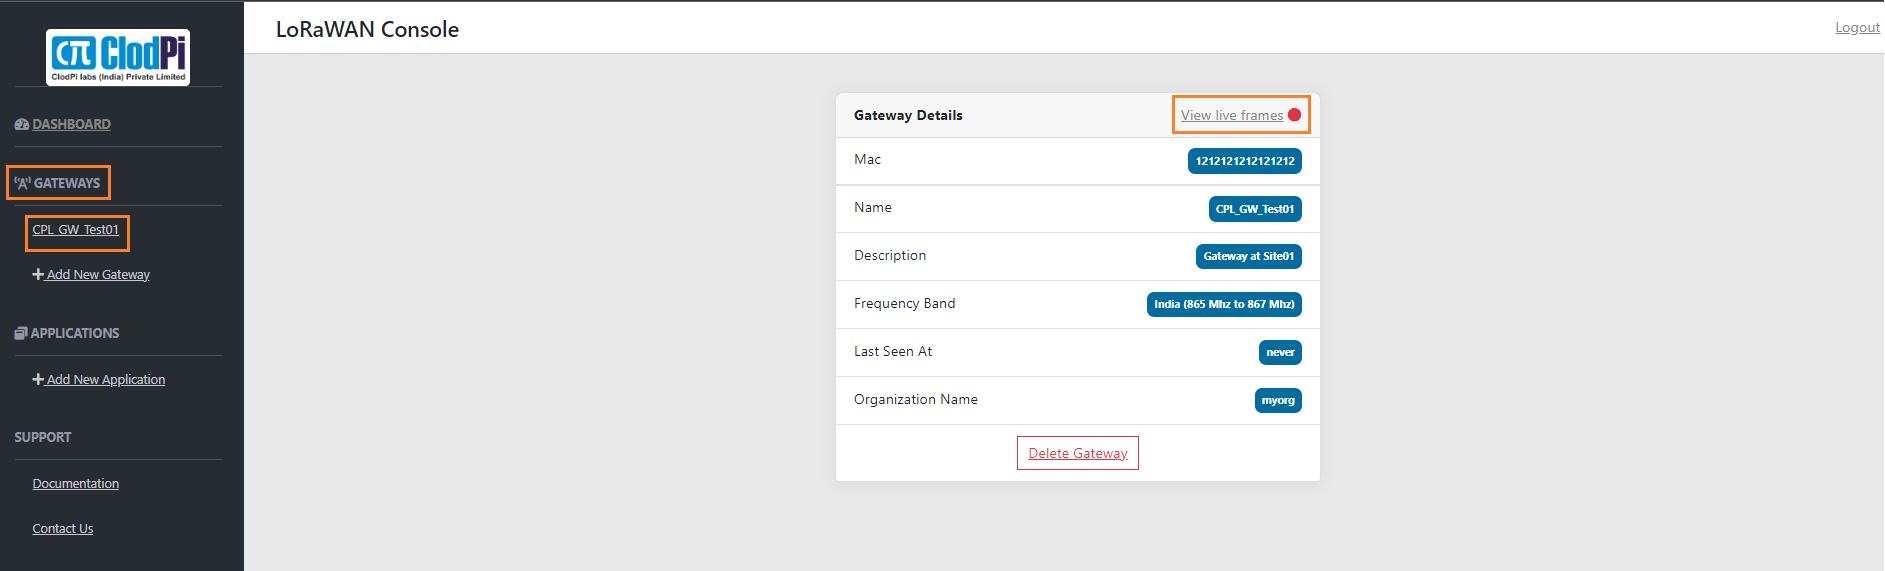
Step 22: To View Registered Gateways, navigate to > Left Panel > Gateways: List of registered gateways is displayed
Step 23: Click on one of them to see the details of the gateway.
Note: The Red Spot denotes the Gateway configuration is not complete
|
|
|
Step 24 : WiFi > LGWxxxxxxxxxxxx > Select
Step 25 : Enter password: 87654321 (Note: This is default password. User can change this password.)
Step 26 : Click Connect.
|
|
|
Step 27 : In the laptop / mobile, open a browser and navigate to http://192.168.100.1/
Step 28 : On Login page,
-
Username: root
-
Password: pass1234
-
Click: Login button
|
|
|
Step 29 : Navigate to System > Reboot > Click ‘PERFORM REBOOT’
Note: This will reboot the Gateway
Next: Login to ClodPi Labs Console and check the newly added gateway is online
|
|
|
Step 30 : Go to device WiFi option.
Step 31 : WiFi > change to the main internet option and connect
|
|
|
Step 32 : On laptop / mobile device, open a new browser
Step 33 : Navigate to https://console.clodpi.io/
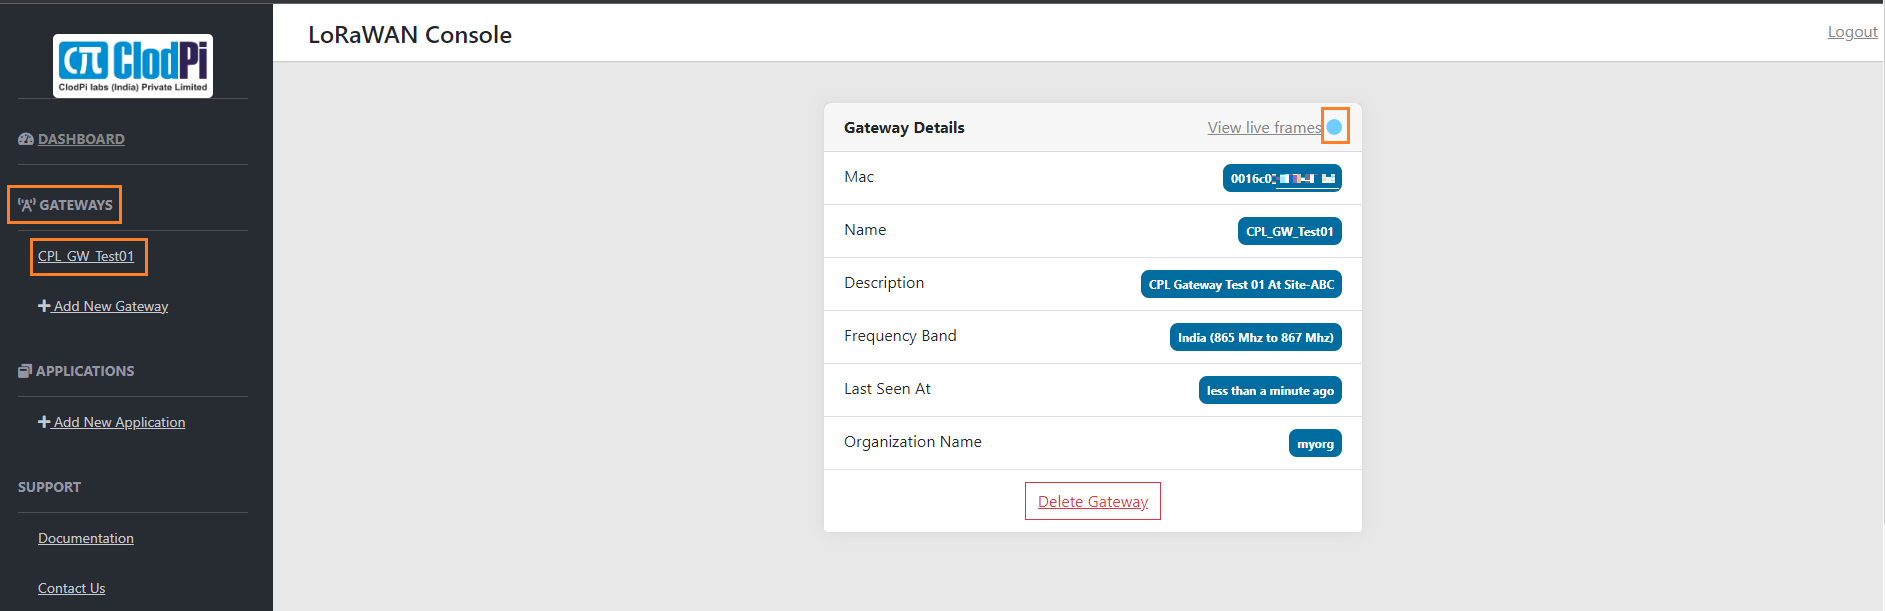
Step 34 : View registered Gateways > Left Panel > Gateways: List of registered gateways is displayed
Step 35 : Click on the gateway to see the details of the gateway.
Note: The Red Spot should change to Blue dot denoting the Gateway configuration is complete and is available online
|
|
|
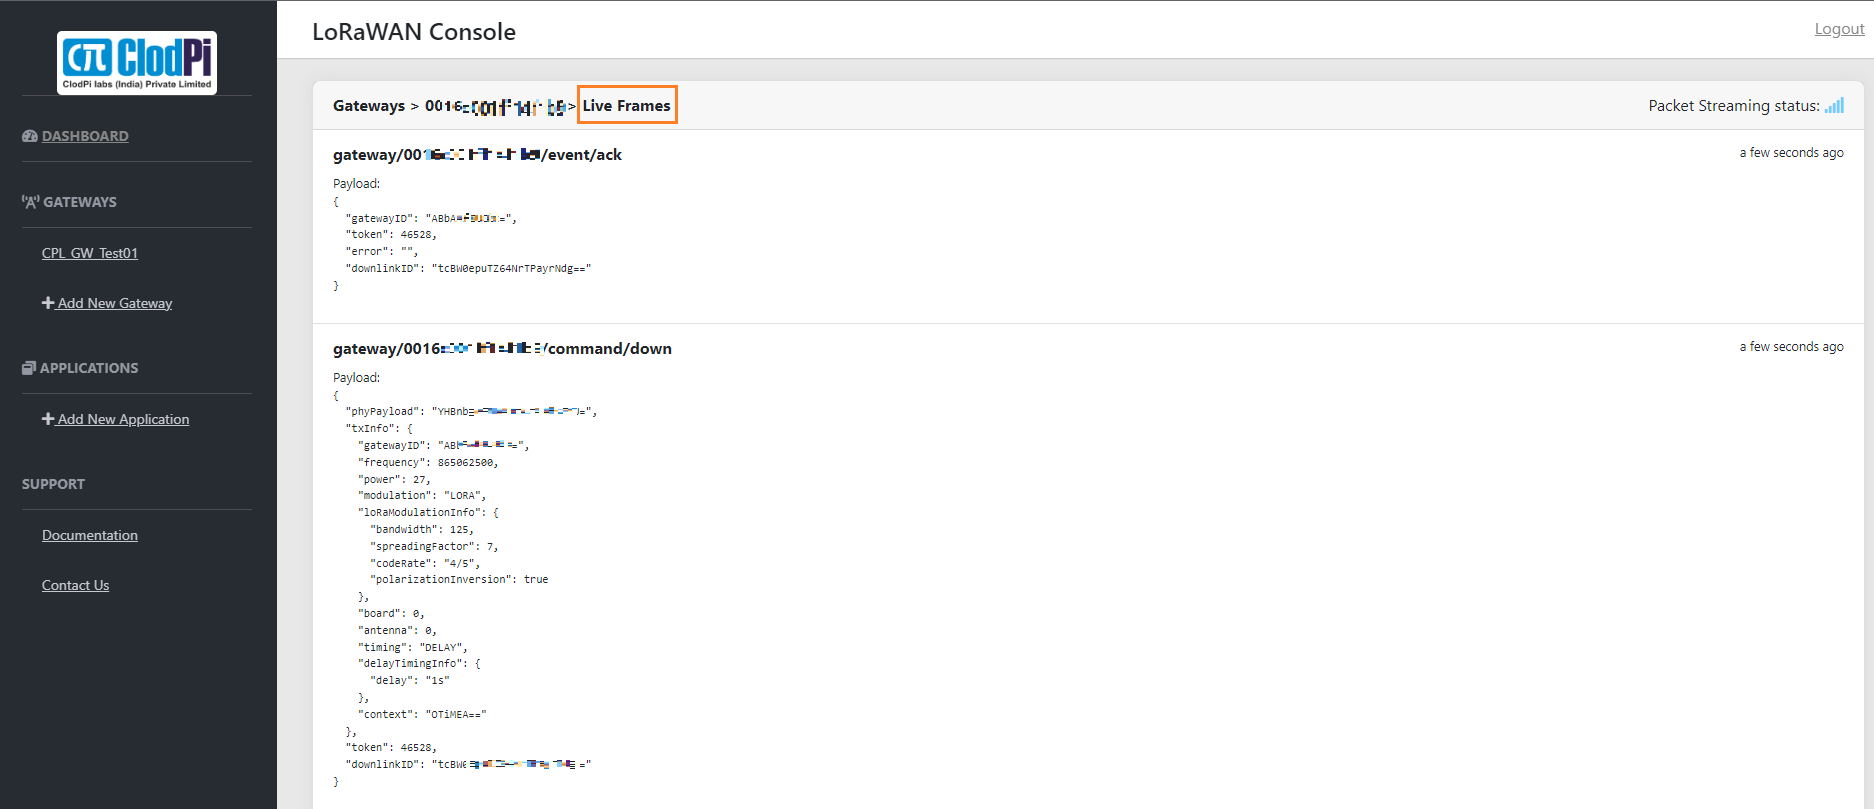
Step 36 : Click on the ‘Live Frames’ link adjacent to the Blue dot to view the Gateway Status.
|
|
|
Step 37 : Remote URL feature: Once gateway is configured completely, it can be accessed remotely by scanning the QR Code which is available below the Remote URL label on the sticker pasted on the Gateway enclosure.
- Scan the QR Code and navigate to the URL. (Note: Copy & make note of this URL for future use to check remotely whether the Gateway is accessible i.e it is online or not.)
- Login page will be displayed.
- Use the same credentials as provided in Step 28.
|
|
![[ClodPi Labs] Discussion and support forum](https://discuss.clodpi.io/uploads/default/original/1X/6046bbcd89d9c9db3896c6cd7b77c593de8d6386.png)