ClodPi Labs - LoRaWAN Gateway - Indoor - Getting Started
The document describes the characteristics of Gateway (Indoor) and gives a reference of how to install the same.
Prerequisite:
User should be ready with these basic things before hand:
- Uninterrupted power supply
- Uninterrupted internet connection with minimum 10 mbps speed.
- An identified place where Line of Sight is clear, near to power mains.
- Avoid locations - like basements, closed rooms, inside cabinets, where strength of the signal can become weak.
- A good quality ethernet cable (cat5e or cat6) to connect gateway device with router.
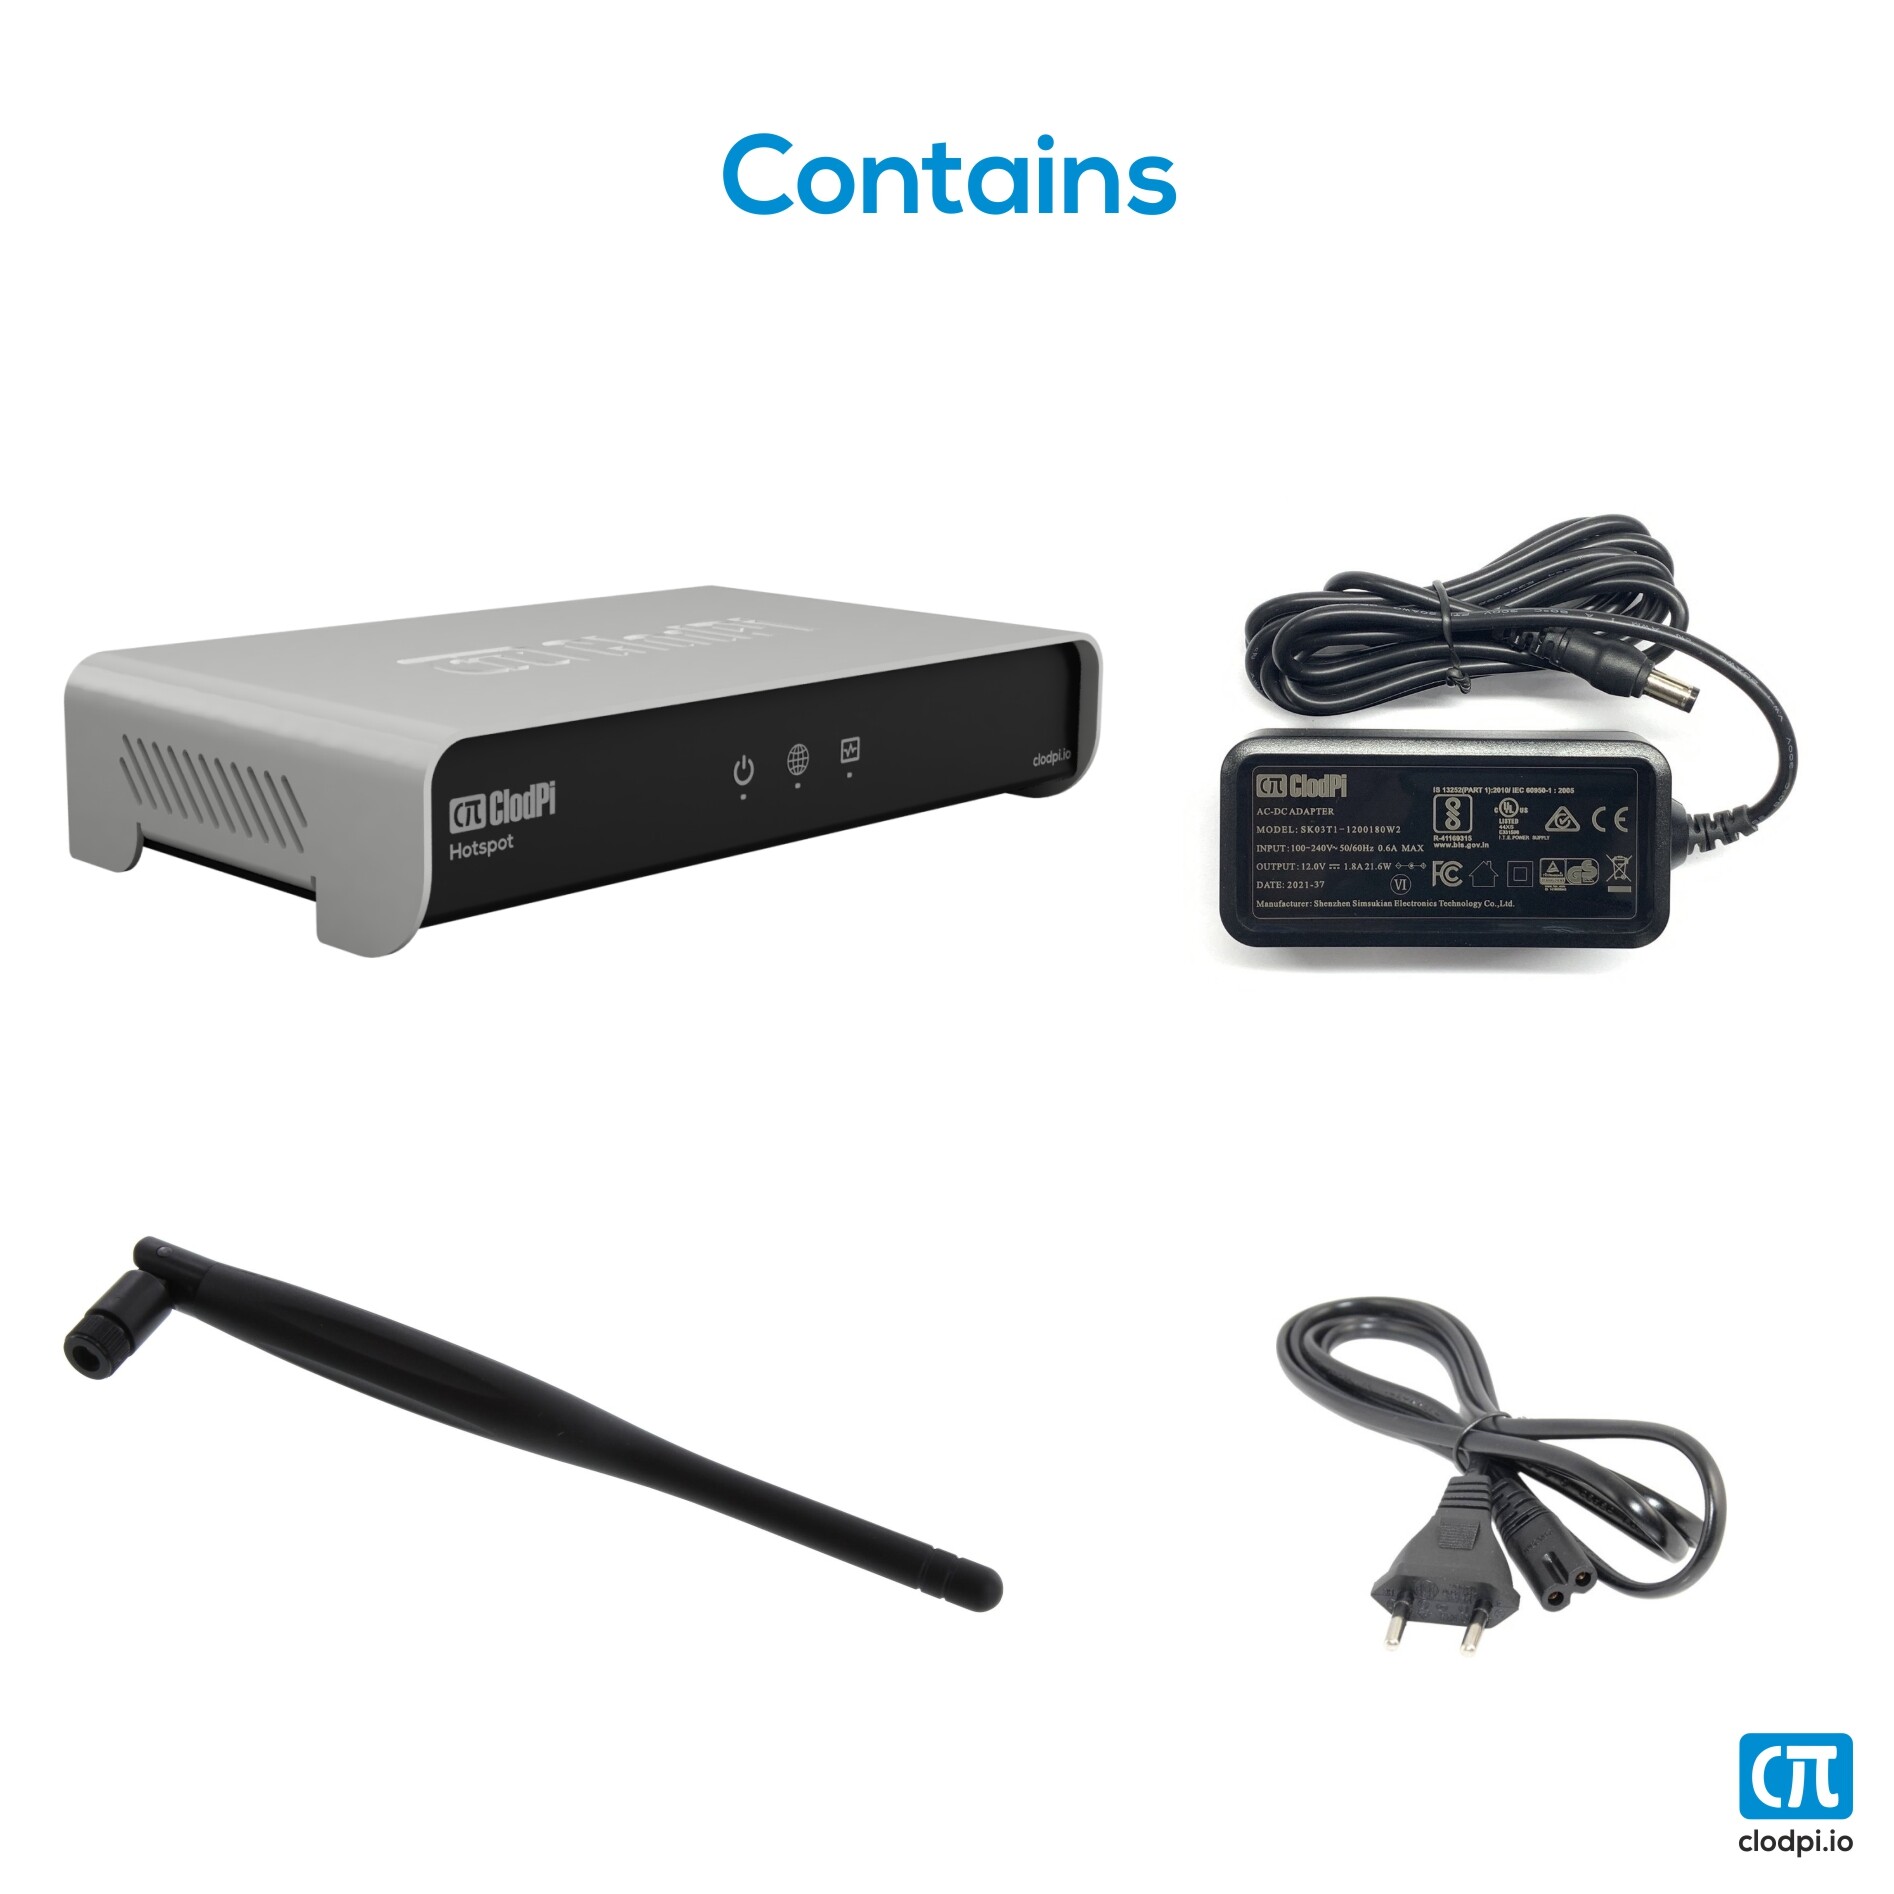
Package Content:
ClodPi’s LoRaWAN Gateway (Indoor) device package comes with the following items:
| SN |
ITEM |
QUANTITY |
| 1 |
ClodPi’s LoRaWAN Gateway (Indoor) |
One |
| 2 |
SMA LoRa Antenna - 3.5 dBi |
One |
| 3 |
12V 1.8A Power Adapter (India specific plug head) |
One |
Note: The images shown are for depiction purposes – actual color and look may slightly vary.
|
|
Safety Instructions:
User should be careful when setting up the device as the device is meant to be used indoors and strictly follow the user guide and safety instructions to avail the Warranty:
- Make sure the antenna is connected to the device before switching ON the power supply.
- Do not install the device in outdoor / semi-outdoor as it will have risks contact with external forces like rainwater, moisture, lightning which may cause irreparable damage to it.
- Avoid placing the Indoor device in a direct open environment (Sunlight / Rain), hot surface, Fire and other harsh climatic conditions and keep away from electrical appliances with strong magnetic / electric fields.
- Avoid strictly risk of fluids [water, beverages, etc] dropping / falling on the device as it may seep into the device enclosure and cause damage.
- Do not try the set up in underwater / submerged mode or near to Fire.
- Do not attempt to open the enclosure. Non-expert handling of the device could damage it. Consult the manufacturer for help, or else it may cause short-circuit, fire, electric shock or breakdown.
- Use of any third-party accessories [outdoor enclosure, power supply, custom antenna, splitters, amplifiers] other than the stock items provided by default with the device by ClodPi Labs will be at the user’s discretion.
- Do not install, use or service the device during a thunderstorm. Please keep the cable disconnected.
- Be ready with the materials as mentioned in the “Prerequisite” section above.
|
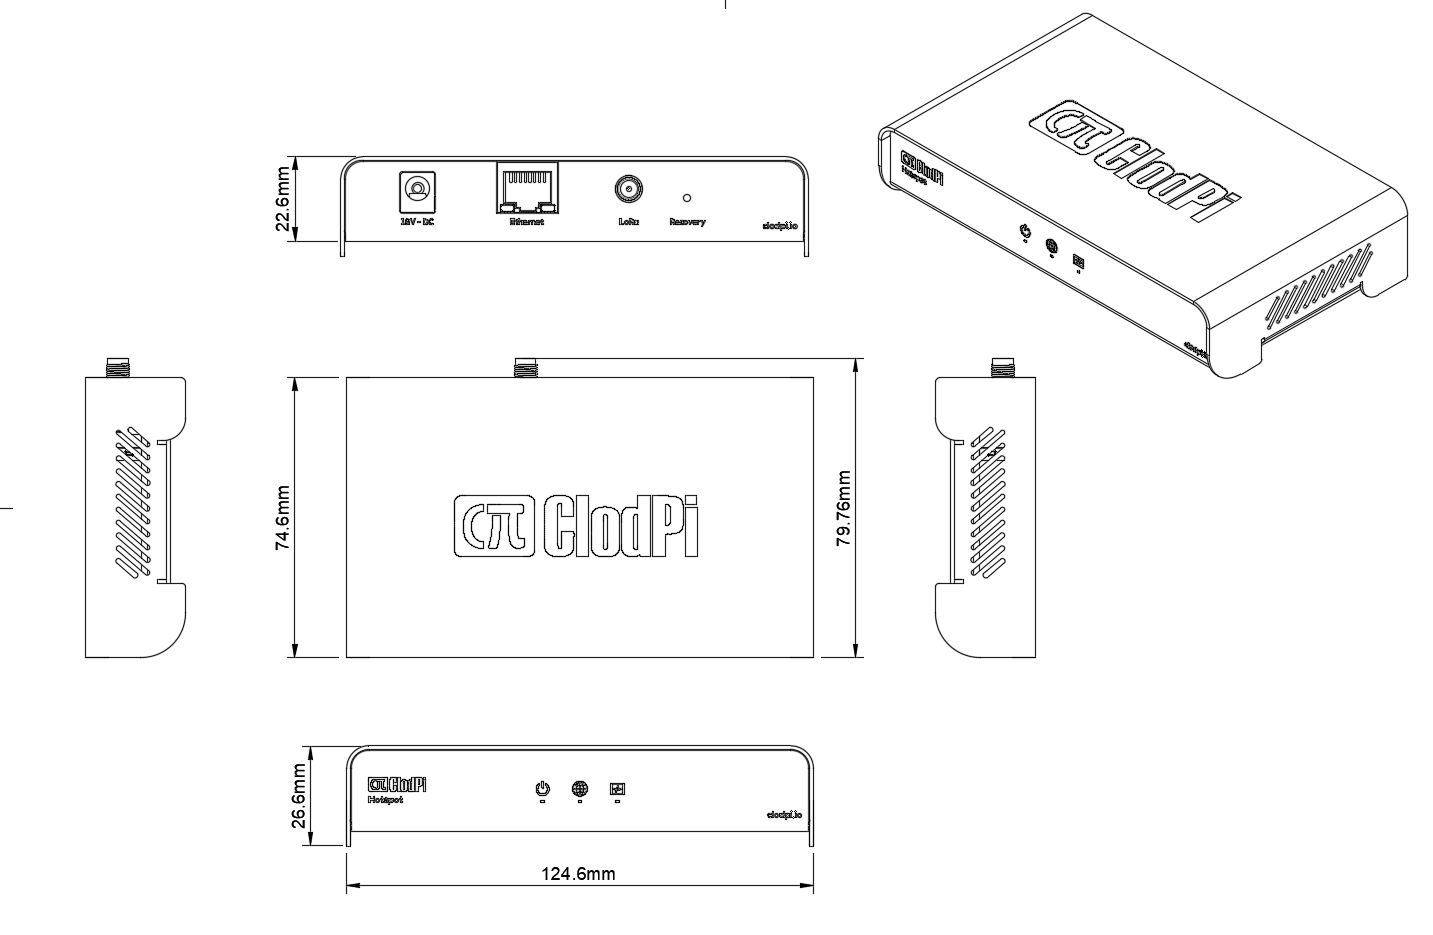
Gateway Enclosure - Introduction:
Note: The images shown are for depiction purposes – actual color may slightly vary.
|
Steps to set-up the device:
|
Open the ClodPi Labs Gateway (Indoor) package and take out all the items.
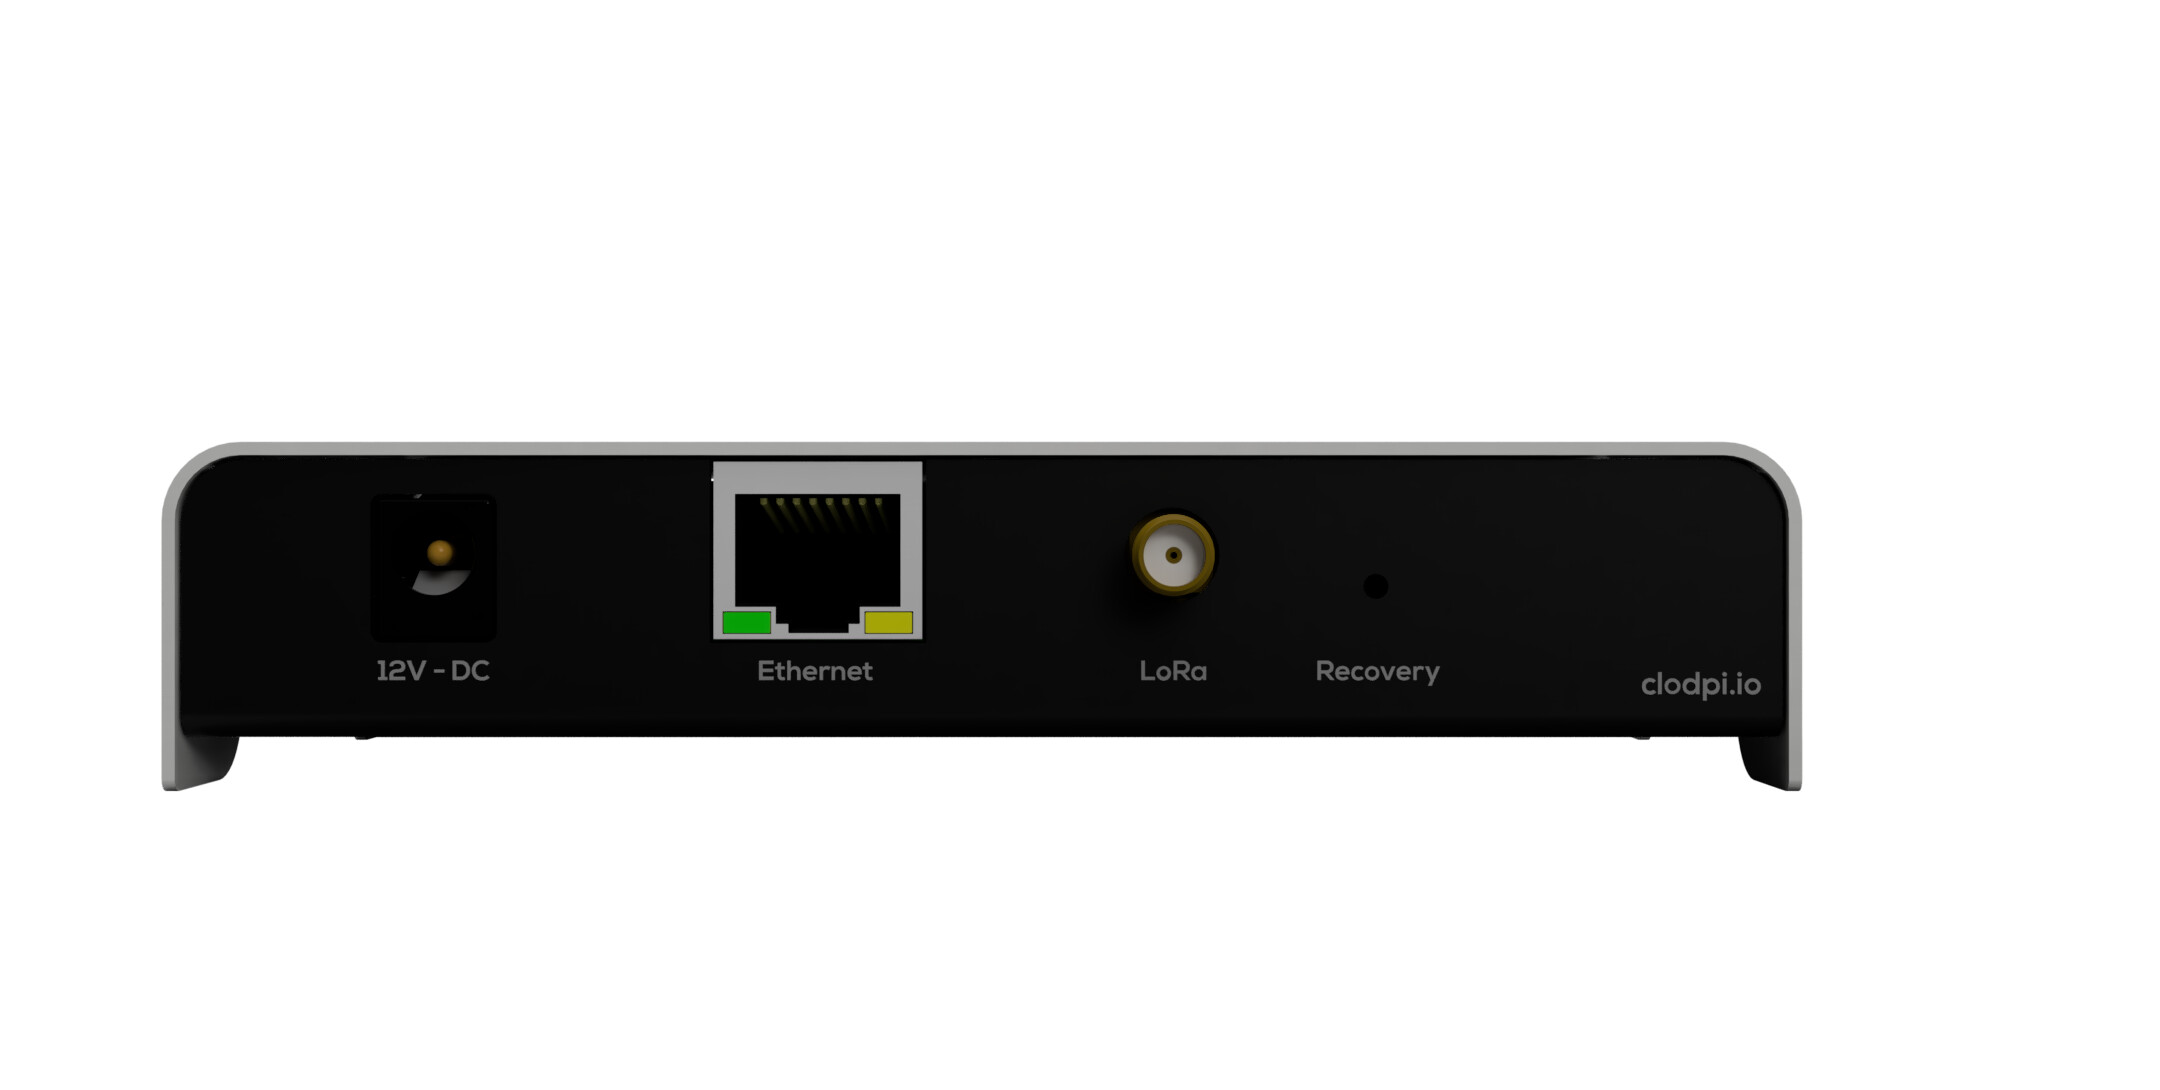
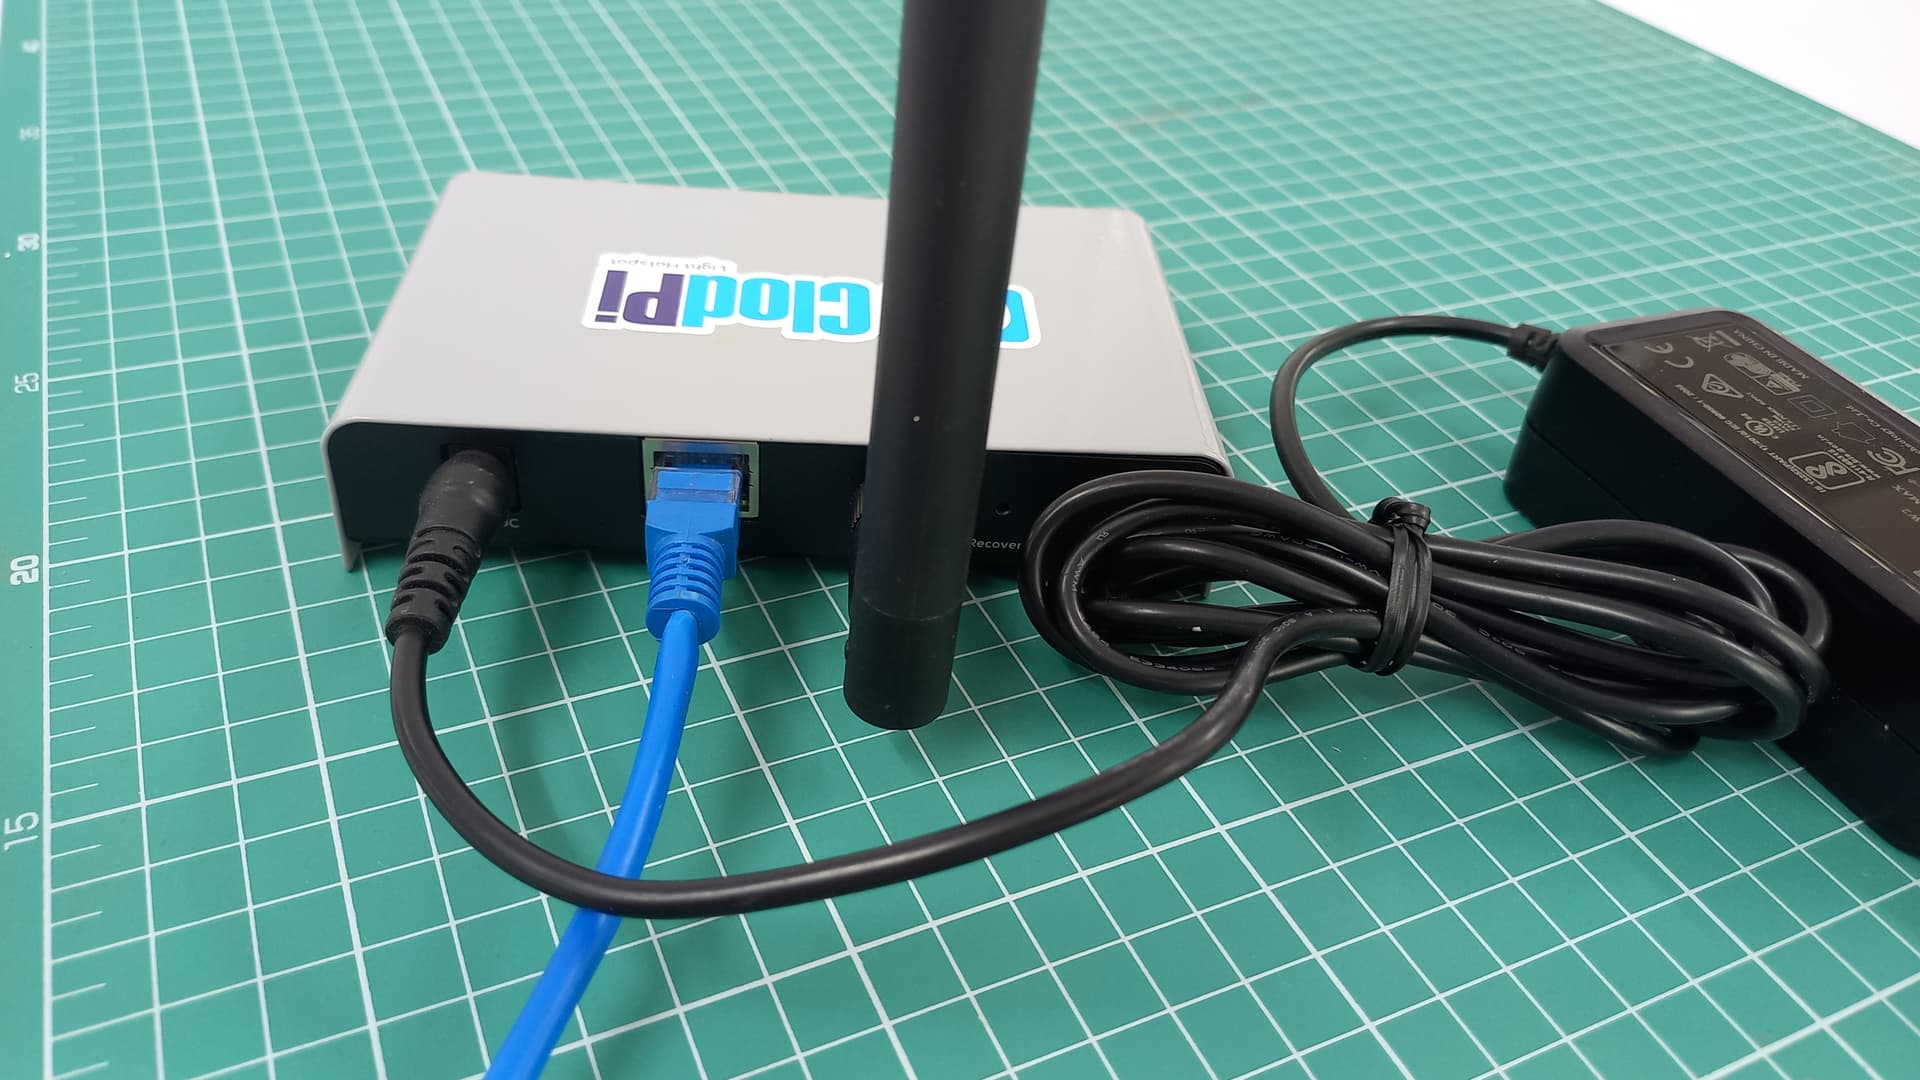
Step 1. Gateway enclosure: Take the enclosure and make sure on the following:
- Antenna connector: One
- Power Jack: One
- Ethernet Jack: Two
- Recovery button: One
- Device ID sticker: Make note of the device details for future reference
|
|
|
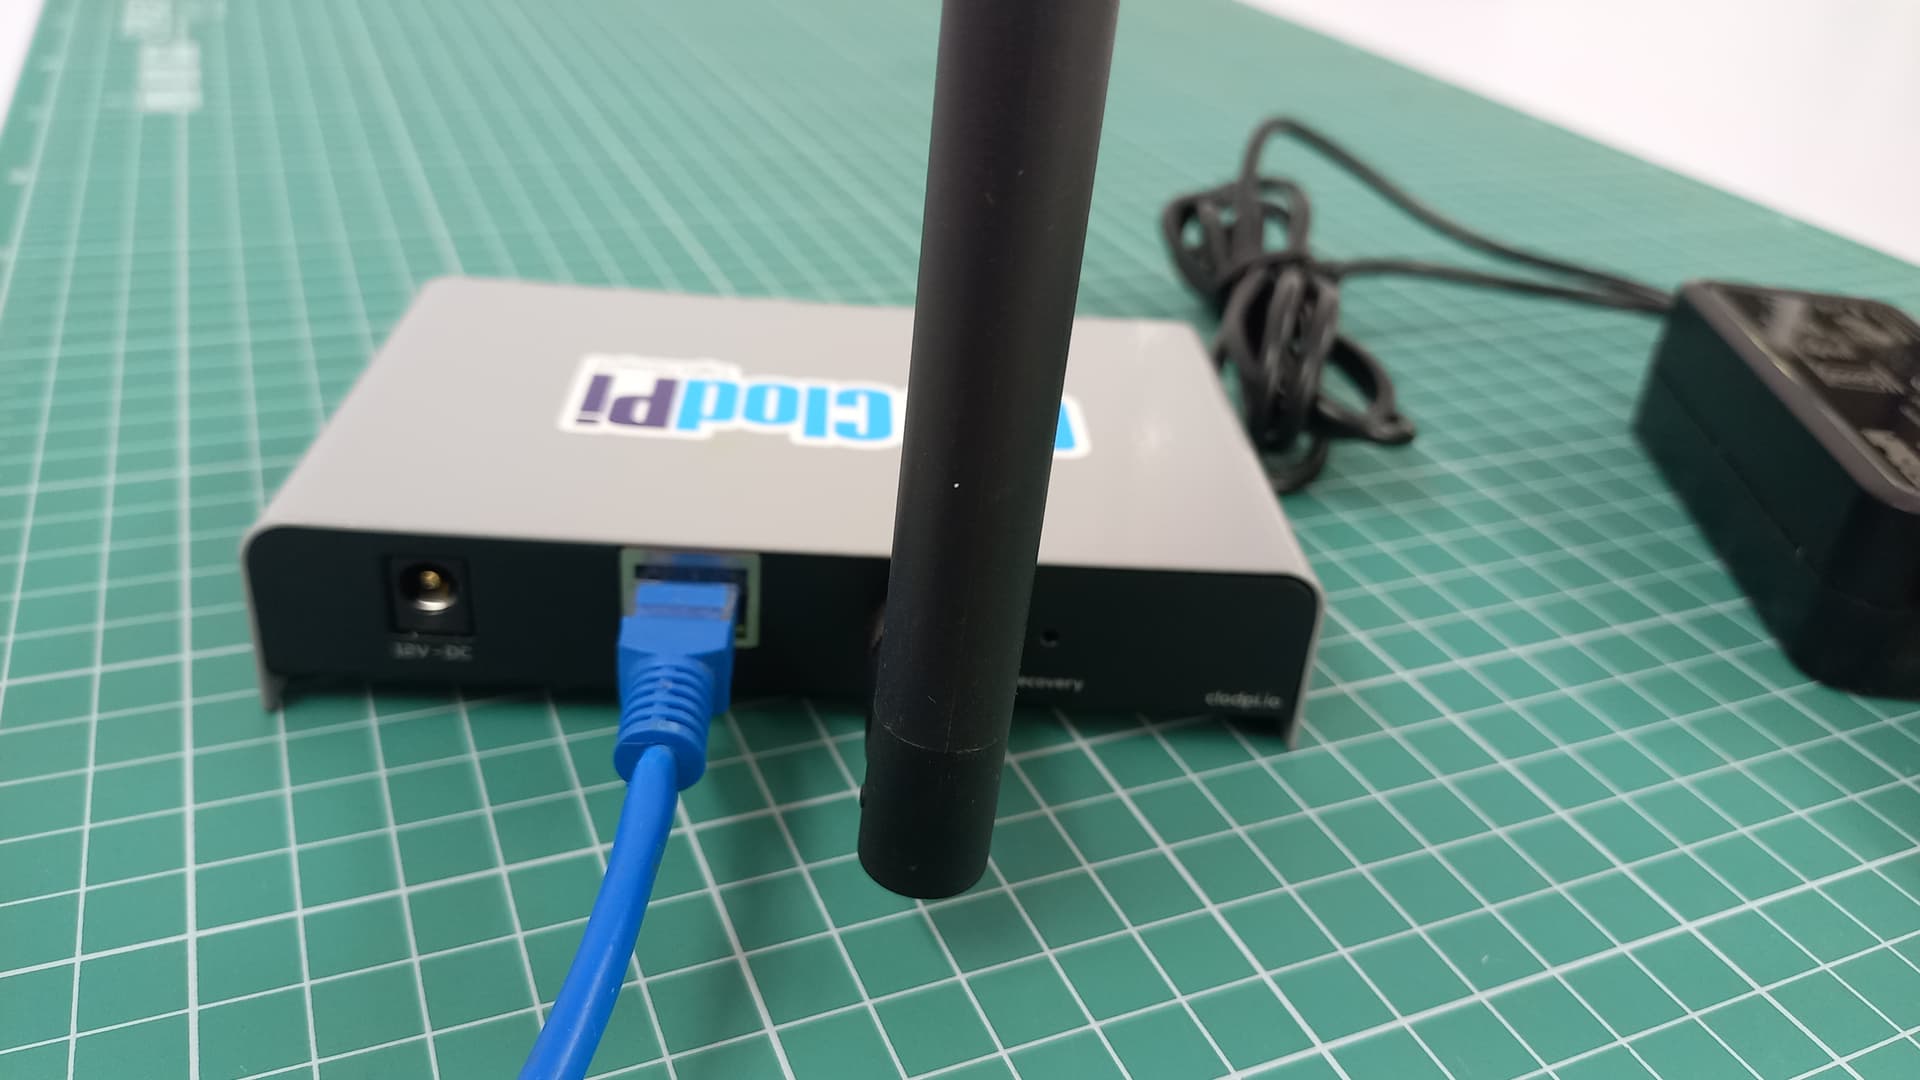
Step 2. Antenna: First, take the Antenna and screw it onto the SMA connector slot provided for the antenna. It should look like the picture.
|
|
|
Step 3. Location: Place the device where it gets clear Line of Sight like your window where there is no obstruction to the network signal and no direct sunlight is reaching. Make sure the power main is not too far.
Step 4. Ethernet connection: For wired ethernet connection, you need an ethernet cable to connect the router / switch and the Ethernet connector jack located at the back side of the device.
|
|
|
Step 5. Power: Take the 12V power adapter and plug it into the mains.
Connect the adapter’s DC Jack into the power jack located at the back side of the device. Now, switch ON the power mains.
Note: DO NOT switch ON the mains unless Ethernet cable is connected to the device.
|
|
|
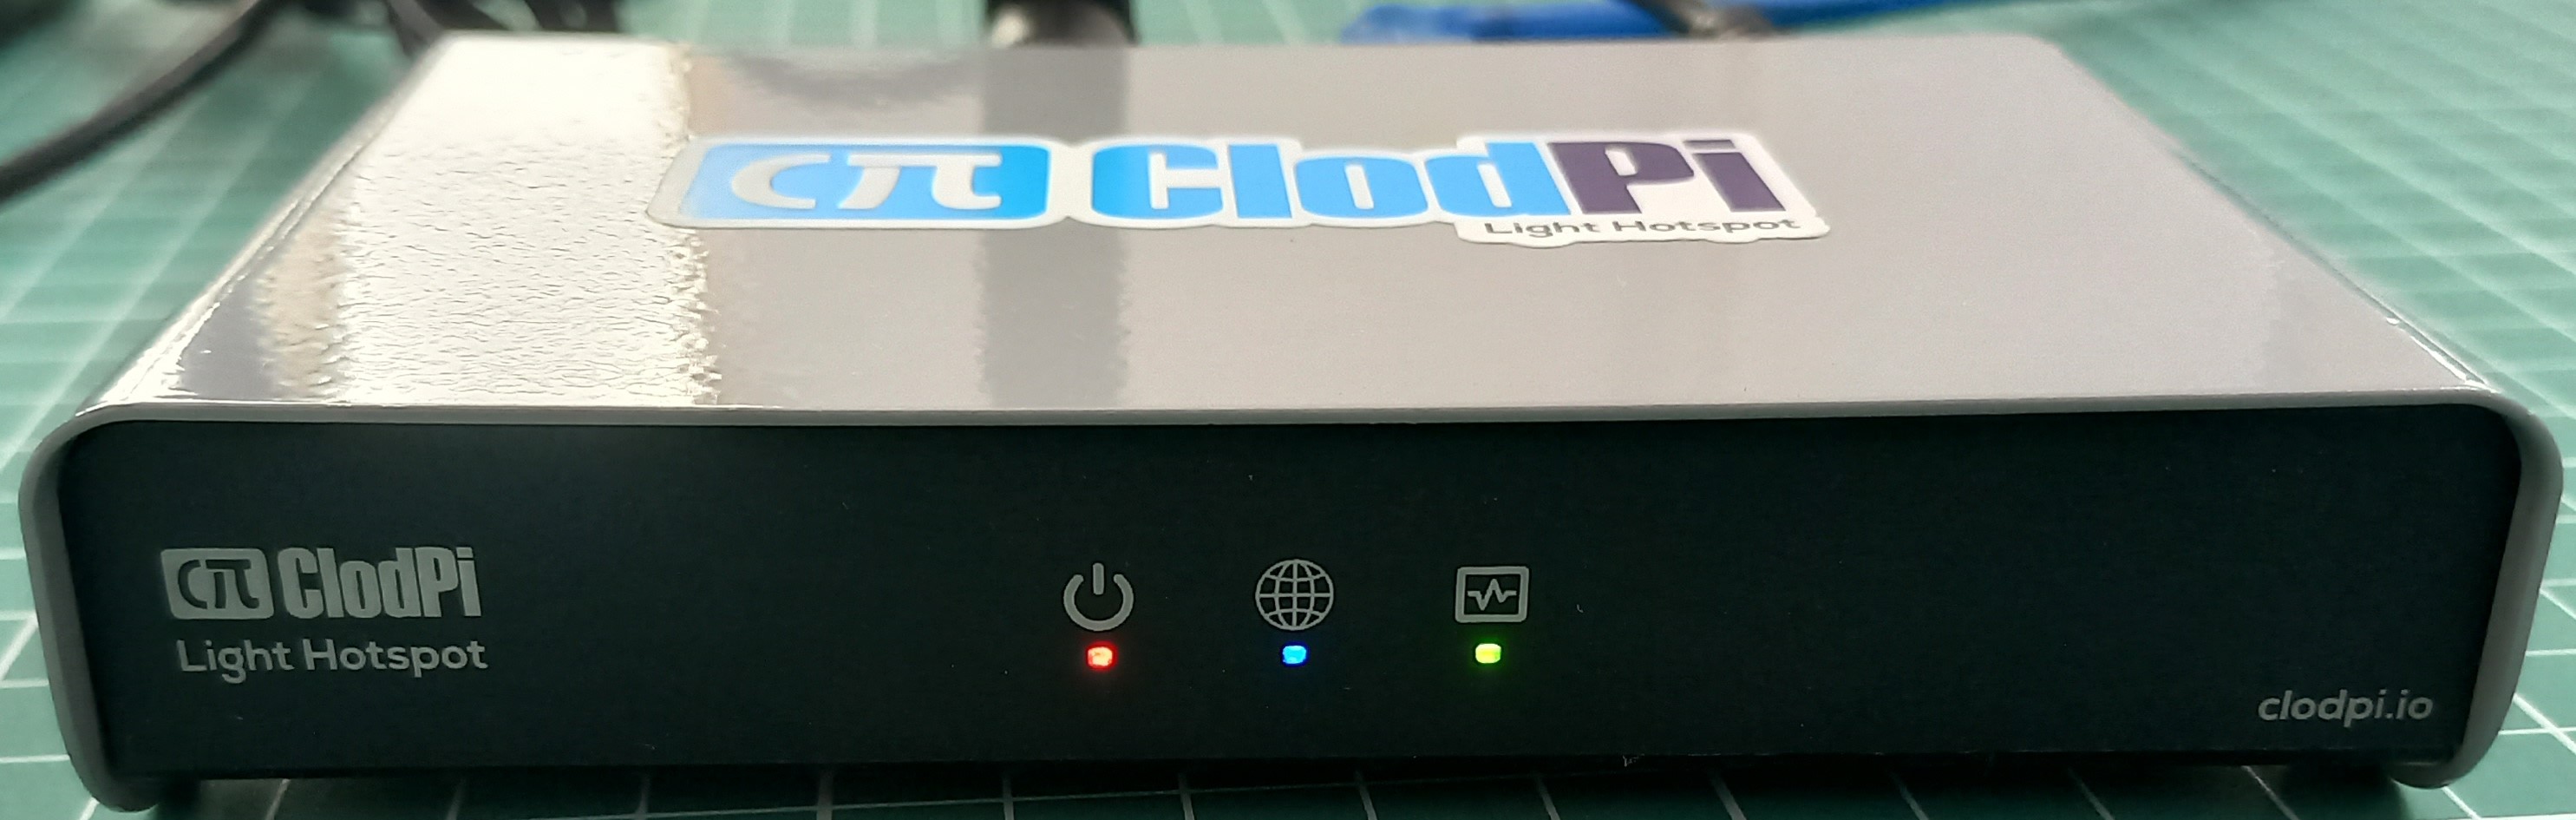
Step 6: Switch on the power for POE Injector. Observe the Power LED on the front side of the Gateway enclosure.
| LED Indicator |
DESCRIPTION |
| Power |
The LED is lit when the power supply is ON. Color: Red |
| Internet |
The Internet LED takes 3 to 4 minutes to lit. Color: Blue |
| Status |
LED will be lit when LoRa is ready to receive packets. Color: Green |
|
|
|
Step 7. Power ON LED should be lit immediately when Power is switched ON. This will start the first booting of the device.
Step 8. The Internet LED is lit after 3 to 4 minutes. This ensures internet data supply.
Step 9. When the first boot process is complete, the Internet LED should also be lit. This may take a few minutes. Once the internet LED is lit, the device is ready to be configured.
Note: Status LED will be lit when the Gateway up and running meaning LoRa is ready to receive the packets.
|
|
Step 10. Recovery: The ClodPi’s Gateway (Indoor) has a push button ‘Recovery’ at the back of the unit for reset purpose. This feature will reset the Gateway to factory settings.
! Reach to ClodPi Labs Support before you try to use this option.
- Using a pin, normally the one we use for mobile handset, Press through the button by positioning the PIN head exactly on the button head and keep the button pressed for 5 seconds. The device should restart. If it does not restart, remove the power adapter plug, wait for a couple of minutes and start the plugin again. All the LEDs should be ON if successful.
|
!!!Caution: !!!
- Make sure the place and the equipment you are using are dry and no water / moisture content enters the enclosure while opening and closing the PC Cover. Fluid / moisture content will severely damage the Gateway.
SUPPORT PROCESS: Send an email to support@clodpi.io
Congratulations! Now, you can start with other configurations for your use case.
Please refer for Steps to connecting the Gateway to Network server: # ClodPi Labs - LoRaWAN Network Console
![[ClodPi Labs] Discussion and support forum](https://discuss.clodpi.io/uploads/default/original/1X/6046bbcd89d9c9db3896c6cd7b77c593de8d6386.png)