![[ClodPi Labs] Discussion and support forum](https://discuss.clodpi.io/uploads/default/original/1X/6046bbcd89d9c9db3896c6cd7b77c593de8d6386.png)
ClodPi Labs - Hotspot - Getting Started
Let us start with ClodPi Lab’ - Hotspot - device setup:
Prerequisite:
User should first create Helium account profile and Wallet.
For Helium Wallet App, Wallet Creation OR Migration details, do refer:
- Home | Helium Documentation
- Wallets | Helium Documentation
- Helium Wallet App | Helium Documentation
- Wallet User Migration Guide | Helium Documentation
User should be ready with these basic things:
- Uninterrupted power supply
- Uninterrupted internet connection.
- A compatible smart mobile phone (Android / iOS) with an internet connection.
- Download Helium Application from Apple Store or the Google Play Store depending on your phone OS, create Helium Profile.
- Download Helium Wallet application and create wallet.
- Have your 12 Words phrase securely noted down.
!! DO NOT SHARE WITH ANYONE OR LOSE IT. YOU CAN’T RECOVER THE 12 WORDS PHARES IF LOST.!!
Note:
- New users (who are trying to onboard their First Hotspot) need to first complete the Creating A New Wallet section.
- Existing users (having already onboarded Hotspots & Helium wallet) need to first complete the Importing Existing Wallet section as per Solana Migration Guidelines.
- Now user is ready with Helium Profile and Helium Wallet and can proceed with Helium Hotspot onboarding / Location assert process.
Please refer at the end of this document for:
- How to change the location of the hotspot?
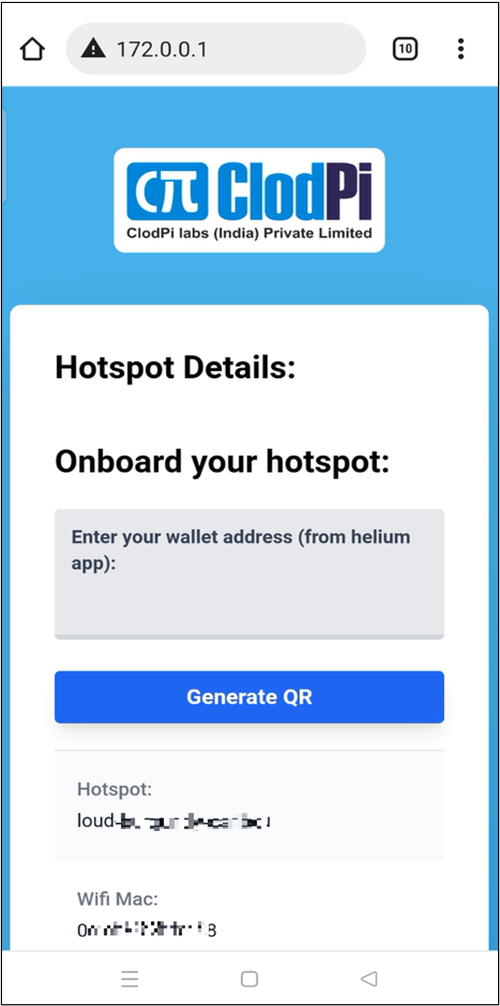
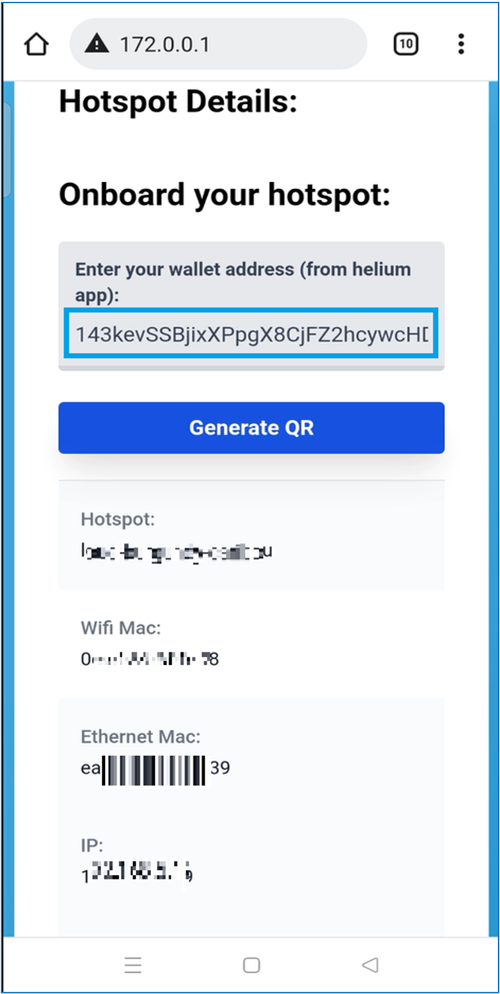
Steps to setup the device:
Perform below steps on your mobile:
|
|
|
|
|
|
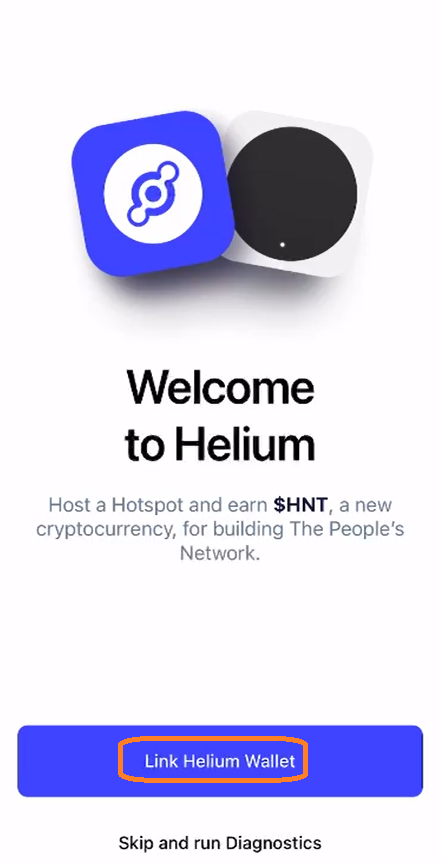
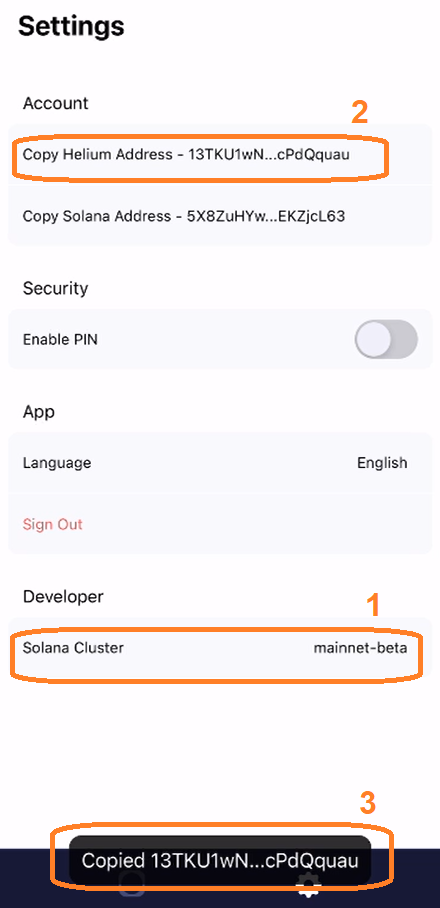
Refer adjacent images. |
|
|
|
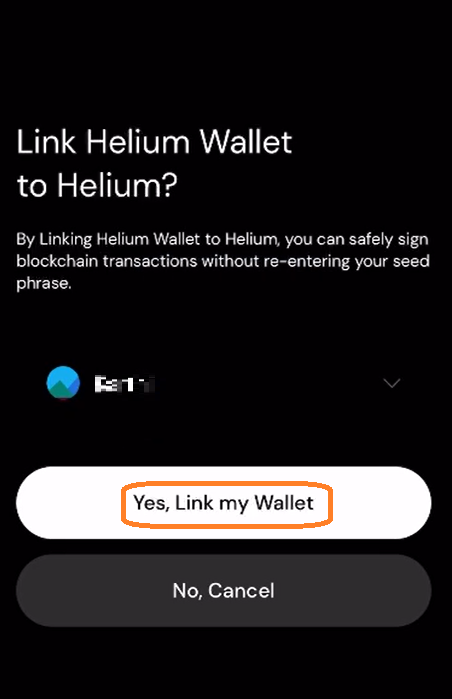
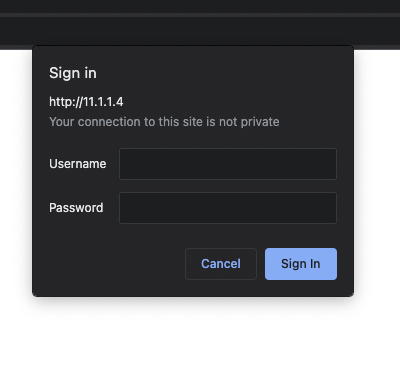
For example, if your device name is “Harsh Blood Mantis”, you can log in with
Note: the password is case insensitive. (b) You can also use the last 3 digits of the device serial number (printed on the back of the device) as the password.
|
|
|
|
|
|
|
|
|
|
|
|
|
|
|
|
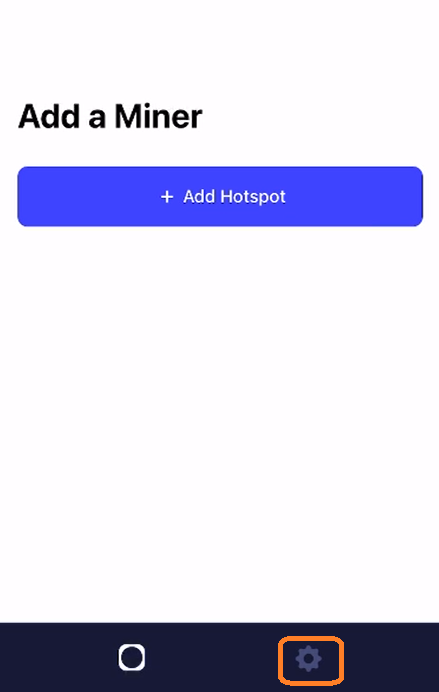
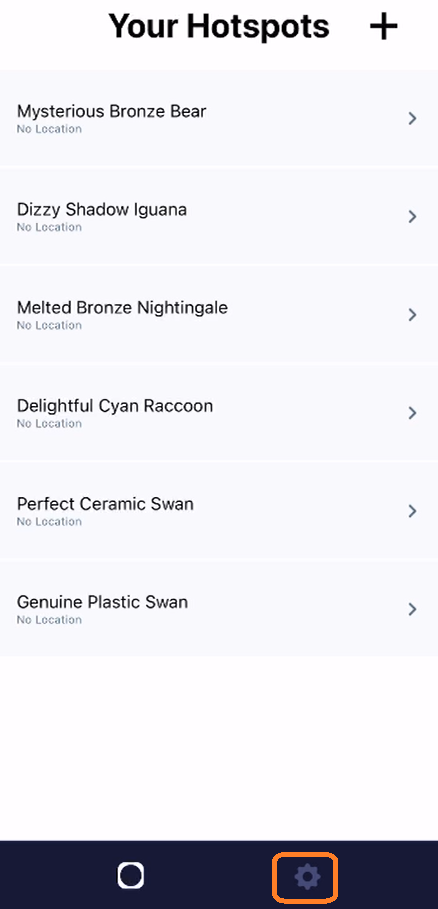
Note: (b) Refer adjacent image. |
|
|
|
Note:
|

Congratulations! Now, you can start monitoring the device on your Application. |
FAQs: |
1) How to change the Hotspot Location?
Please follow the guideline on getting SOL currecy in your wallet: b) Learn about “The Solana Token”, “Account and Rents” & “Swap Utility” here |
|
|
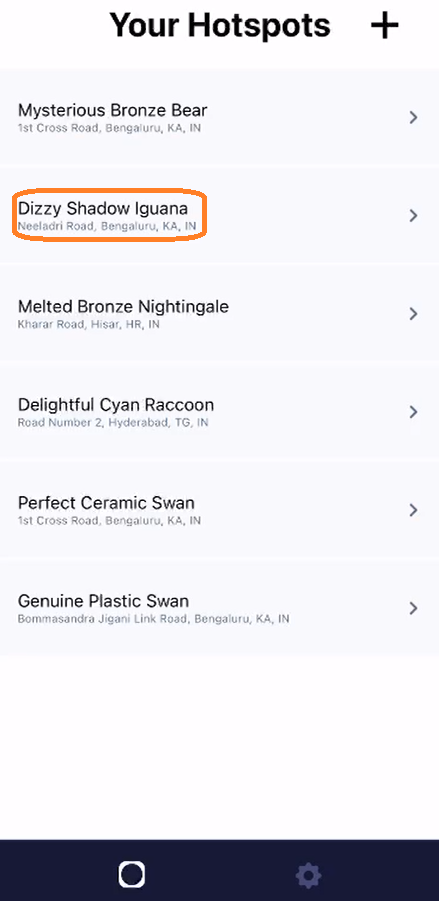
Step 1: Helium Application:
|
|
|
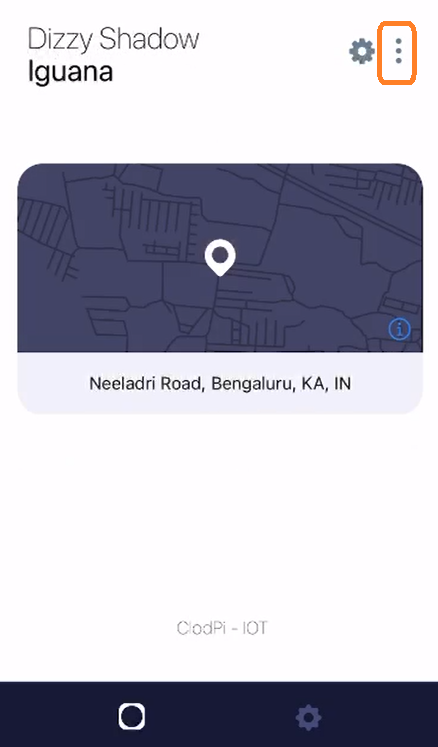
Step 2: Hostspot current Location:
|
|
|
Step 3: Assert New Location:
|
|
|
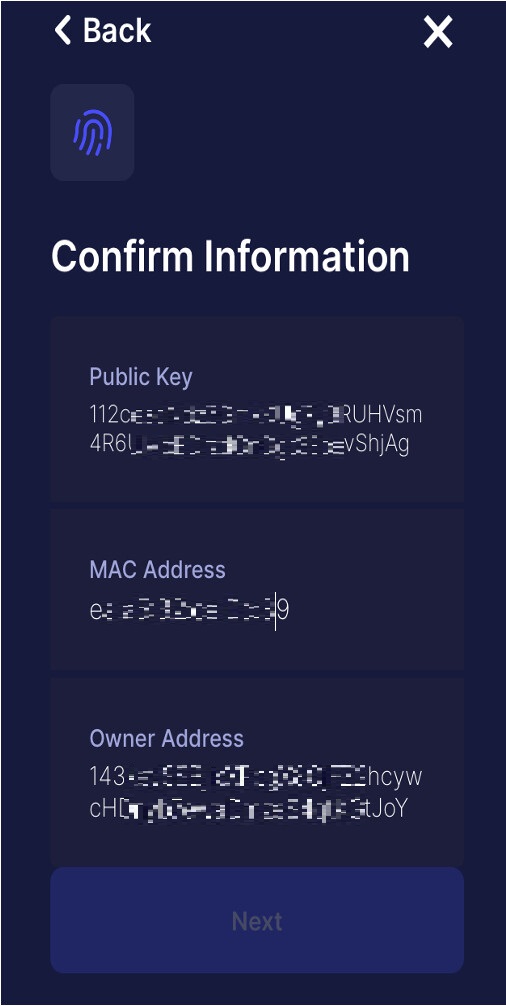
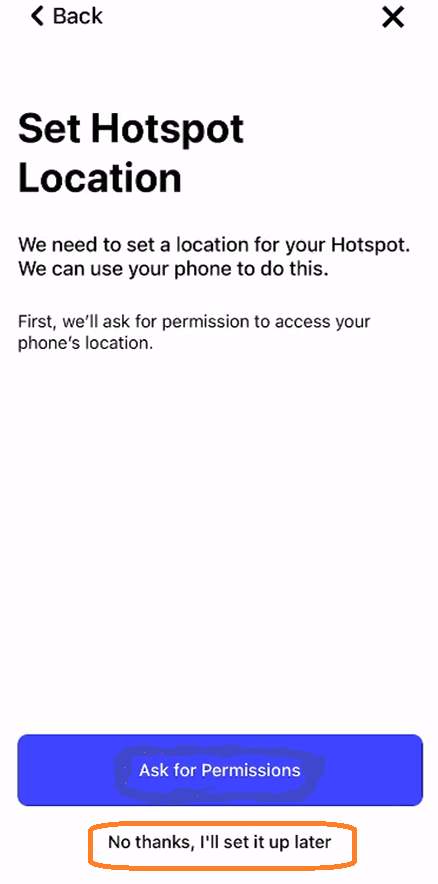
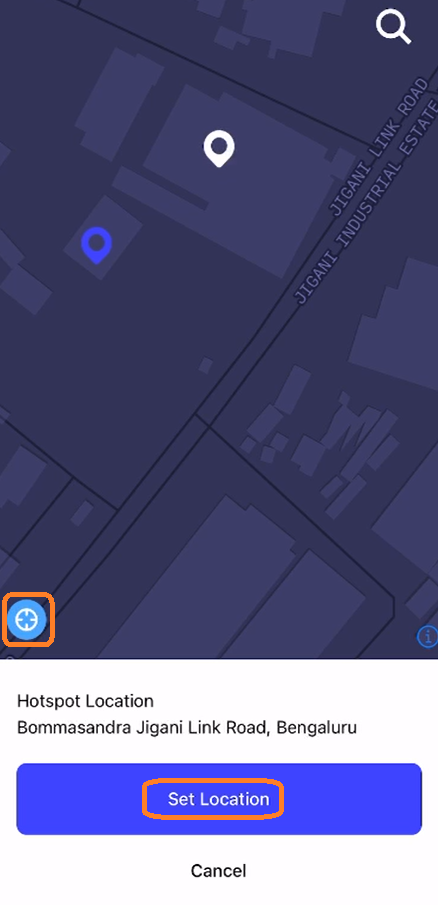
Step 4: Set Location: The user needs to confirm the location of the device by tapping on the “Set Location” option.
|
|
|
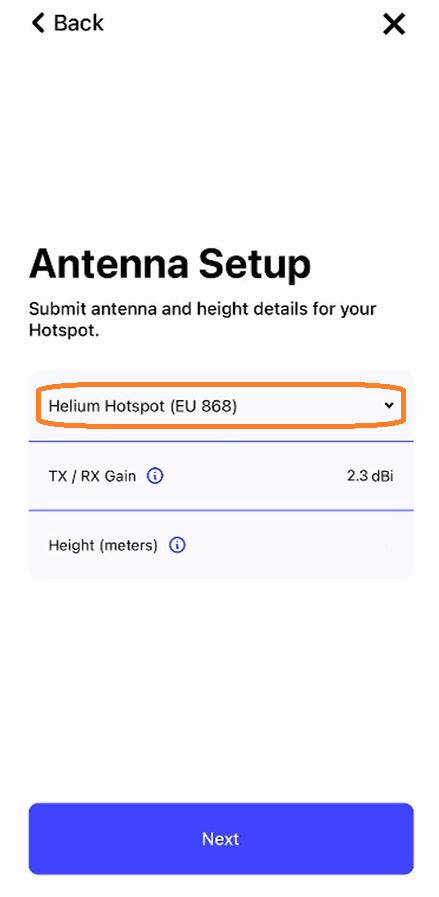
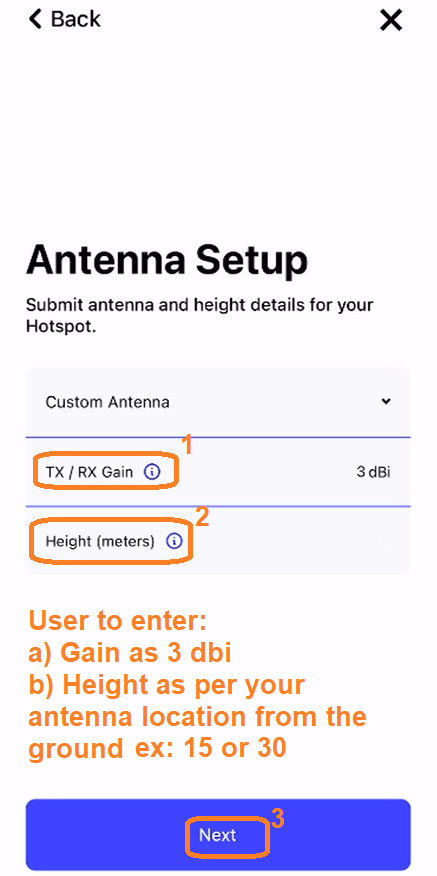
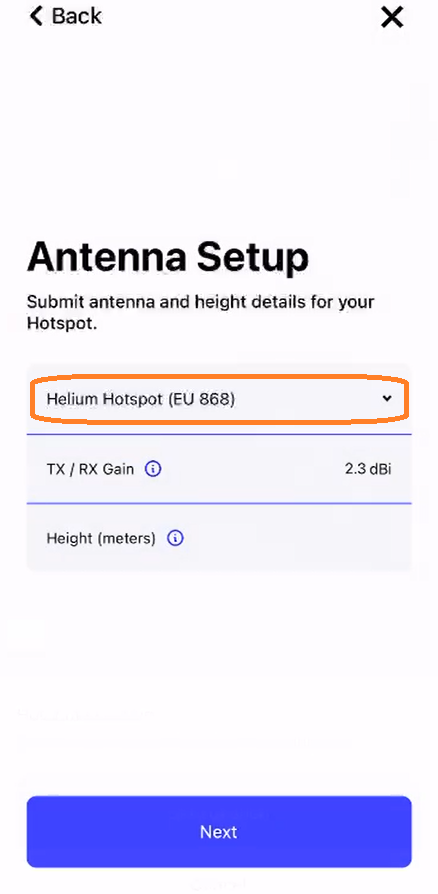
Step 5: Antenna Setup: The user needs to click on ‘Helium Hotspot (EU 868)’ option |
|
|
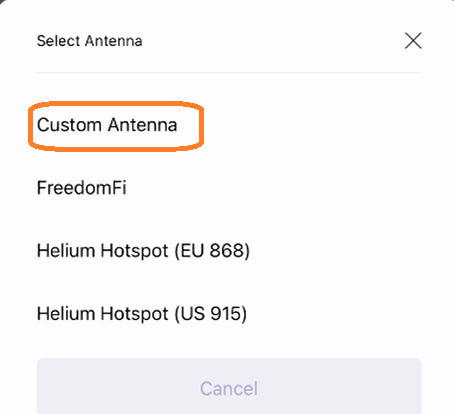
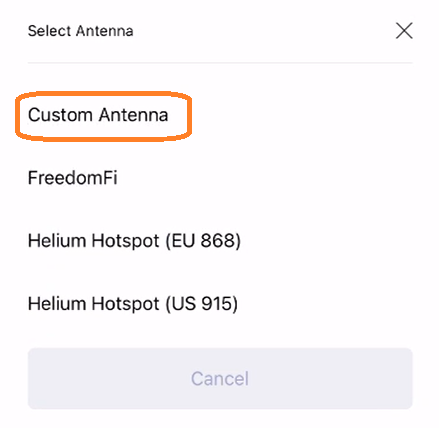
Step 6: Select Antenna pop up is displayed. Click on “Custom Antenna” option. |
|
|
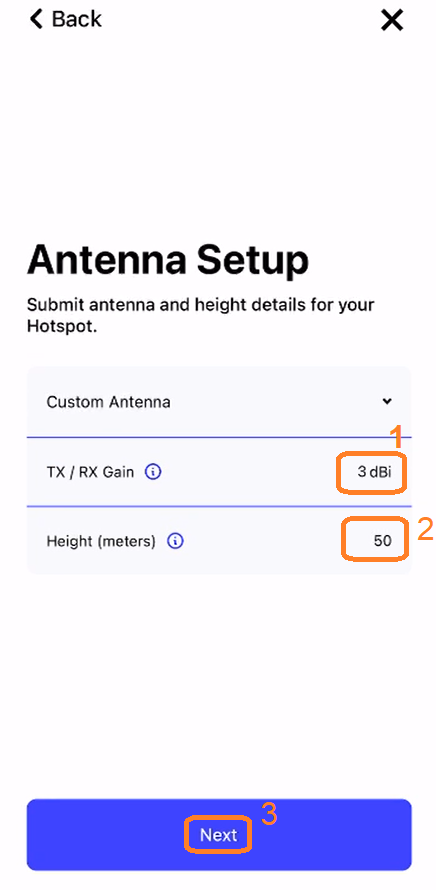
Step 7: Custom Antenna Setup pop up is displayed. Enter details as below:
Note: (b) Refer adjacent image. |
|
|
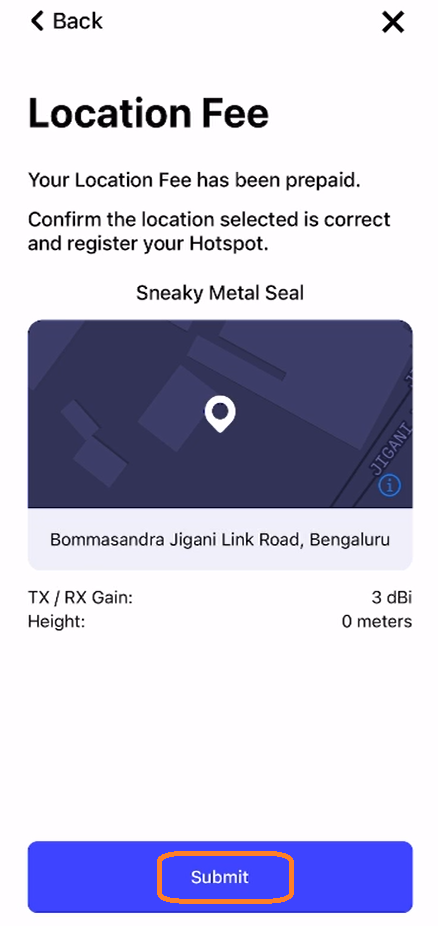
Step 8: Location Fee: page will be displayed. A location assert activity has to be done by clicking on the “Pay Fee & Submit” option. Make sure to have sufficient SOL currency in your wallet else “Pay Fee & Submit” button will not be enabled as shown in adjacent image. |
|
|
Step 9: Registering: Depending on the blockchain network, the hotspot Location change transaction process can take up to 10 minutes to complete. Note:
|
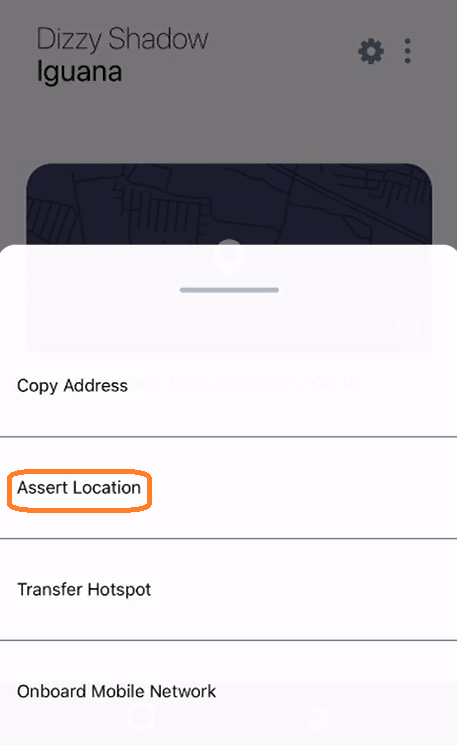

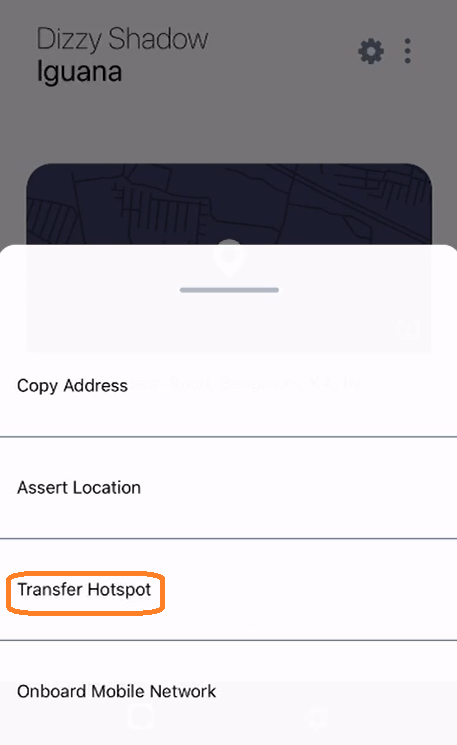
2) How to transfer ownership of the Hotspot?
NOTE:
- Ownership of a hotspot can only be transferred by the wallet which owns that hotspot on the blockchain (whoever has the private key/seed phrase of that wallet). ClodPi Labs has no way of transferring ownership of devices and cannot assist with 3rd party sales where the seller does not transfer ownership of the device.
- In order to transfer ownership of a hotspot, the device must have performed some Proof of Coverage activity within the last 24 hours. This is a security measure implemented by the Helium network to prevent users from purchasing broken or non-working hotspots. There is no way to transfer ownership of a hotspot which has not performed any Proof of Coverage activity during last 24 hours.
Pre-requisites:
- In order to successfully transfer ownership of a hotspot you must have the Helium Wallet App logged into the wallet which owns the hotspot in question. You will also need the receiving address (Solana address) of the target wallet to which you would like to transfer ownership.
*Ask the recipient for his / her Solana address which can be copied from Helium Wallet app > Settings > Share Address > Solana tab > use Copy or Share and proceed with sharing the address.- **There is a nominal fee which is charged to transfer ownership of the device. This is a network fee which must be paid, and is not charged by ClodPi Labs. HNT in your wallet will automatically be burned to provide the 55,000 DC if you do not have sufficient Data Credits in your wallet - there are no additional steps needed for this burning process.
|
Step 1: Helium Application:
Step 2: Hostspot current Location:
|
|
|
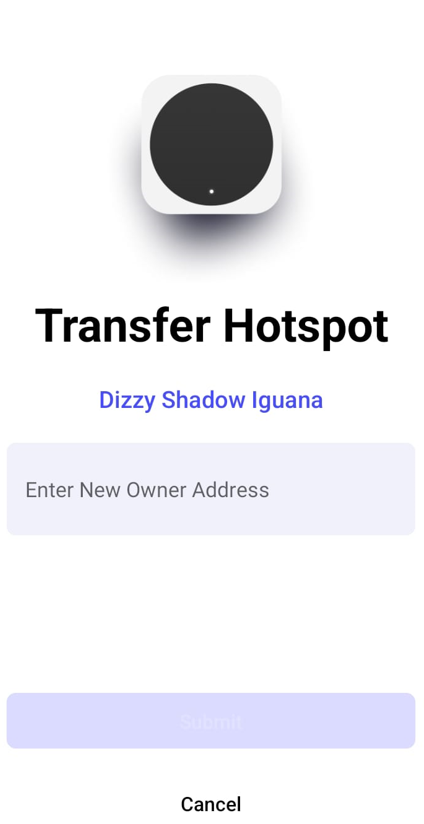
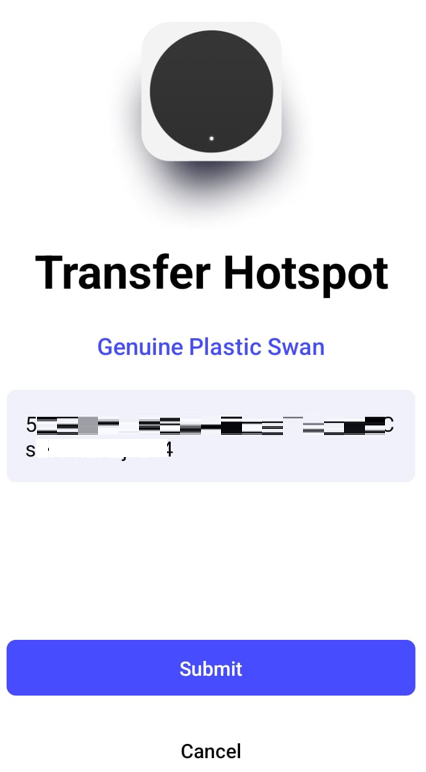
Step 3: Transfer Hotspot screen
|
|
|
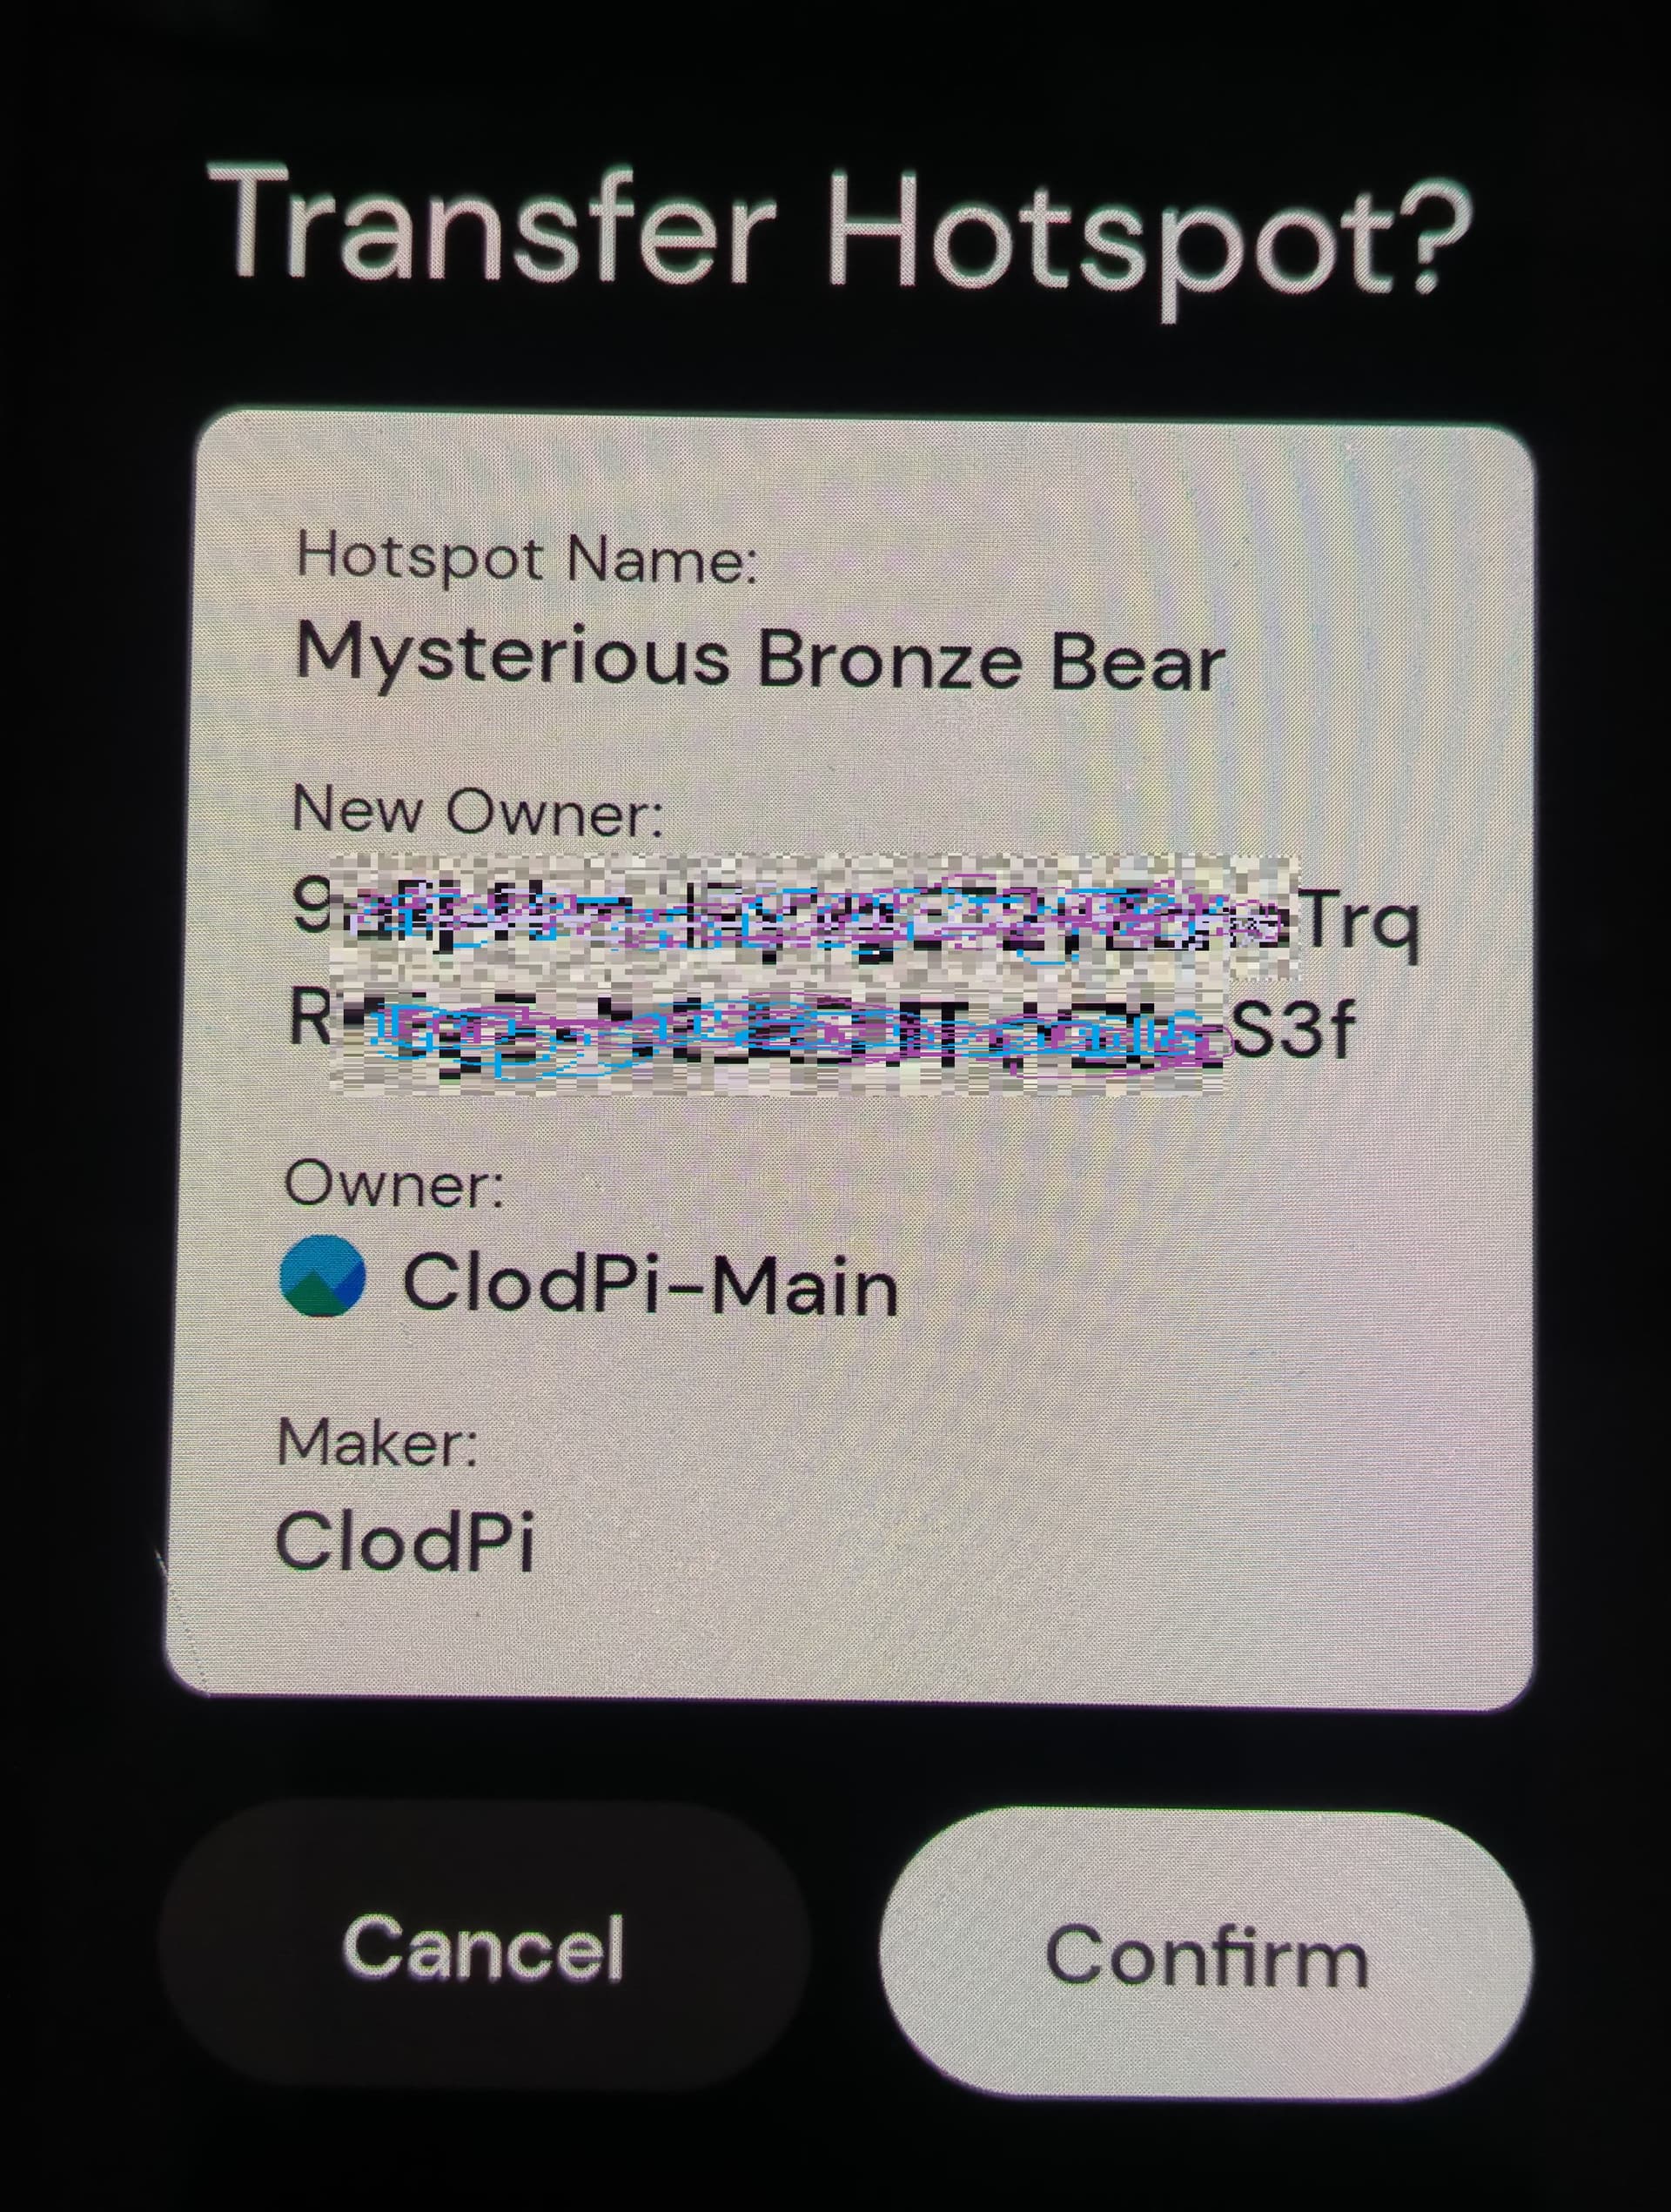
Step 4: Helium Wallet App
|
|
|
Step 5: Helium Explorer - Hotspot Transfer status:
|