|
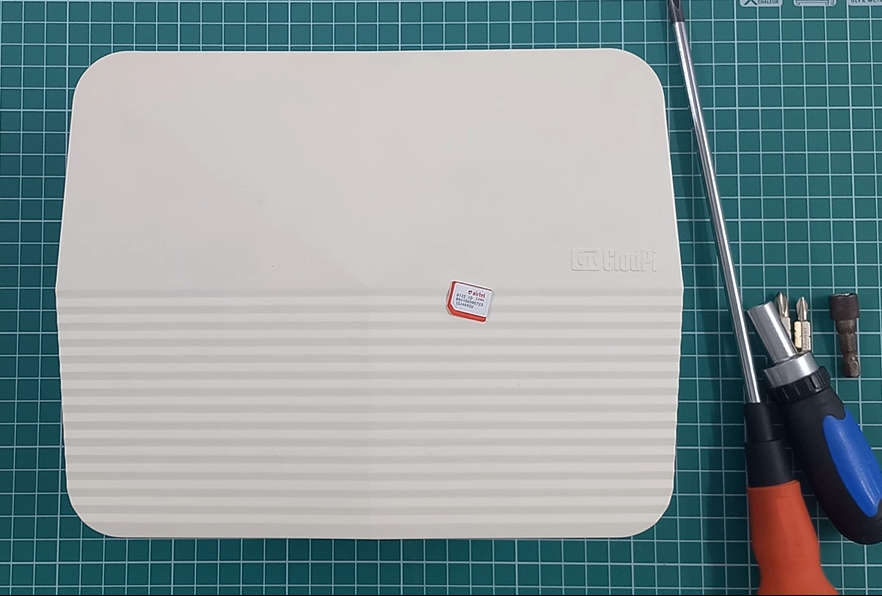
Open the ClodPi’s Gateway (Outdoor) package and take out all the items. Once the Gateway configuration process is complete then we will install the device at the selected outdoor location.
Step 1. Steps to place the SIM (micro) in the Gateway:
- Take the Gateway, SIM (micro), Screwdriver with PH1 tip and a soft cloth or sponge on which we will keep the Gateway.
|
|
-
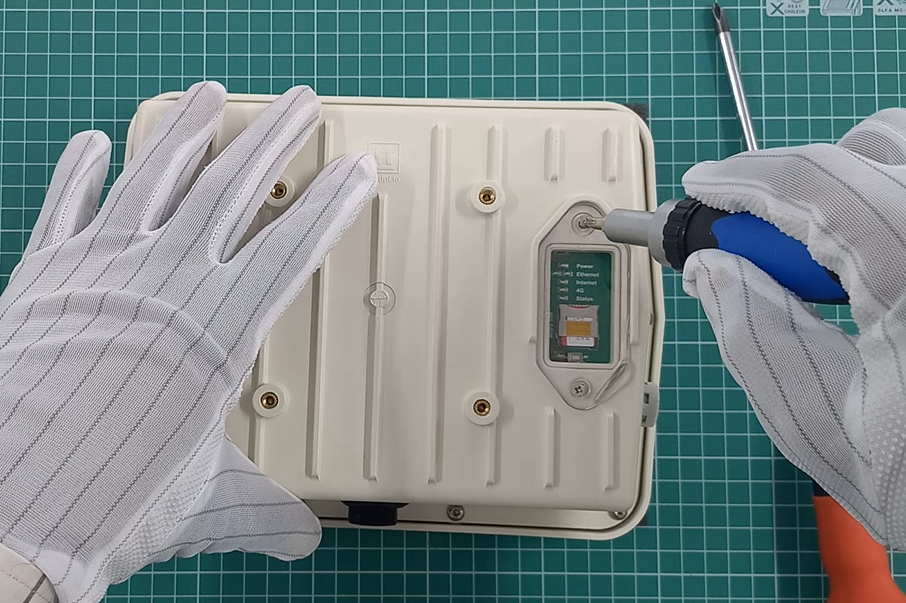
Keep the Gateway upside down.
-
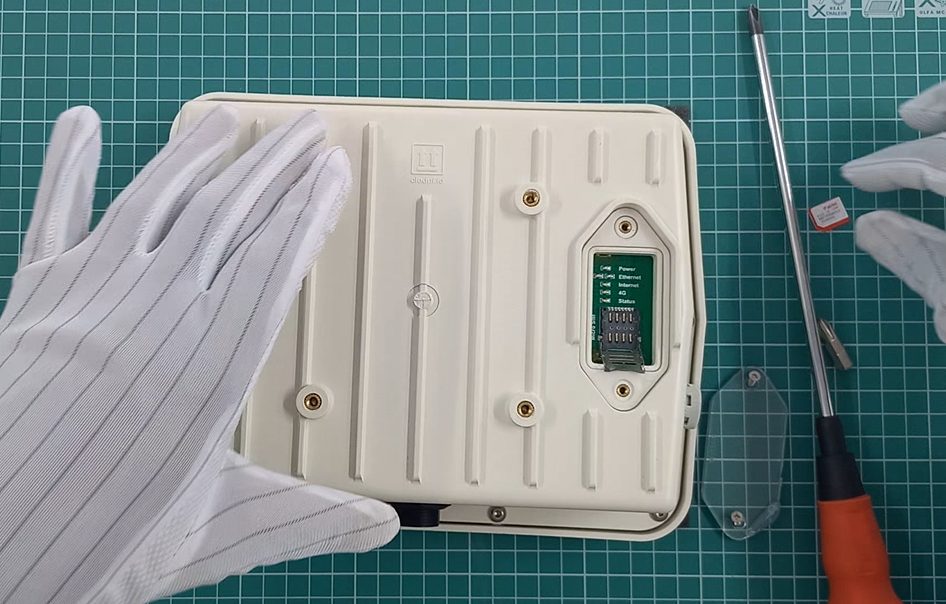
You will see the transparent PC Cover tightened with two screws on to the enclosure.
-
Take a screwdriver and remove both the screws
|
|
|
|
|
- Move the SIM Slot cover towards your side and lift up the cover
|
|
- Take your SIM (micro) and insert into the SIM Slot as shown in the image
|
|
|
|
|
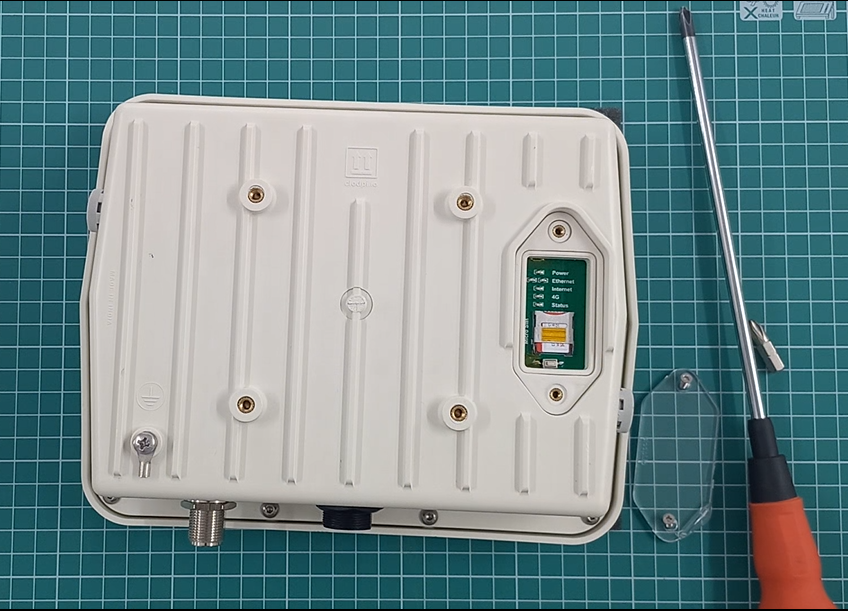
- Take the transparent PC Cover and place it back properly. Using the screwdriver, tighten both the screws with appropriate torque.
Caution: Do not tighten the screw too much else it may damage the PC Cover.
Next step is to connect the Gateway with Power and Internet sources. For that, we would need a PoE Injector, Cat5e or Cat6 RJ45 cable and Internet.
|
|
|
Step 2. N to N cable:
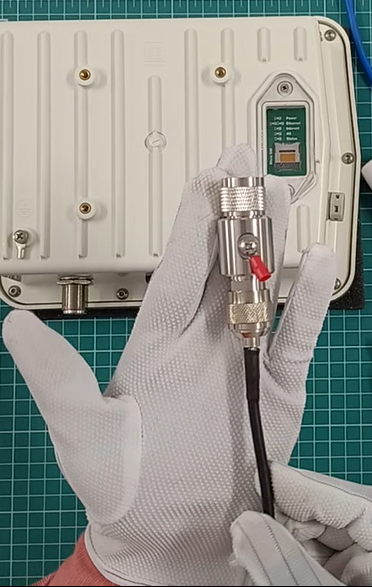
- Take the N to N cable and connect one end to the Surge Arrester. Tighten it appropriately.
|
|
- Take the antenna, remove the nut and washer. Take the the other end of N-N cable and connect to the antenna as shown in the image.
Note: We must safeguard the antenna to cable connection, cable to surge-arrester and surge-arrester to enclosure joints for any water slippage by using the Water-proof tape and Insulation tape. The same is explained in later steps.
|
|
|
Step 3. Now take the other end of RJ45 Ethernet (cat5e or cat6) cable and connect to the RJ45 connector at the outdoor enclosure.
Note: Refer “Operations procedure” steps at the “Prerequisite” section to understand how to set-up the RJ45 connector over the RJ45 Ethernet cable.
|
|
|
Step 4. Power: To provide power to the Gateway, we will be using Power over Ethernet Injector (PoE - IEEE 802.3at) provided along with the package by connecting the PoE Injector with the power mains and to the Gateway:
-
Connect the POE Injector power cord (black) provided to the power main.
-
Take the RJ45 cable (cat 5 or cat6) and connect its one end to Data & PWR Out jack at PoE Injector.
-
DO NOT switch ON the mains unless RJ45 cable (cat 5 or cat6) is connected to the device.
-
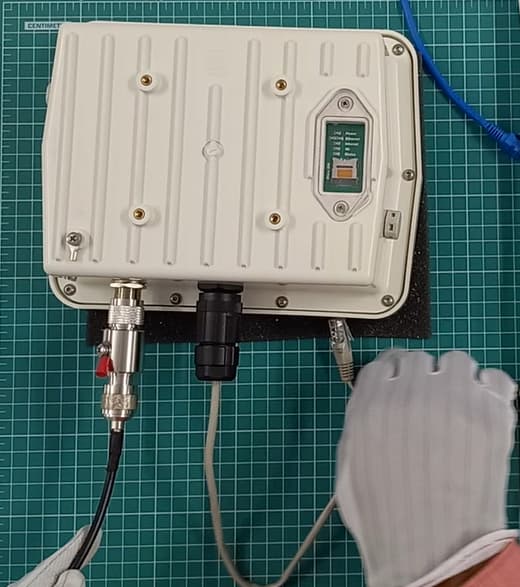
Connect the power cord of the PoE Injector with the power main. Make sure the data plan for the SIM is also ‘ON’. The complete setup should be like the adjacent image.
Note: This image is a depiction. In a real situation, the enclosure will be at the location where you want to mount it. PoE Injector will be near the power main.
|
|
|
Step 5. Steps to configure the SIM:
-
Take your mobile (to connect the mobile with Gateway WiFi)
OR
-
Take your laptop (to connect the laptop with Gateway WiFi)
-
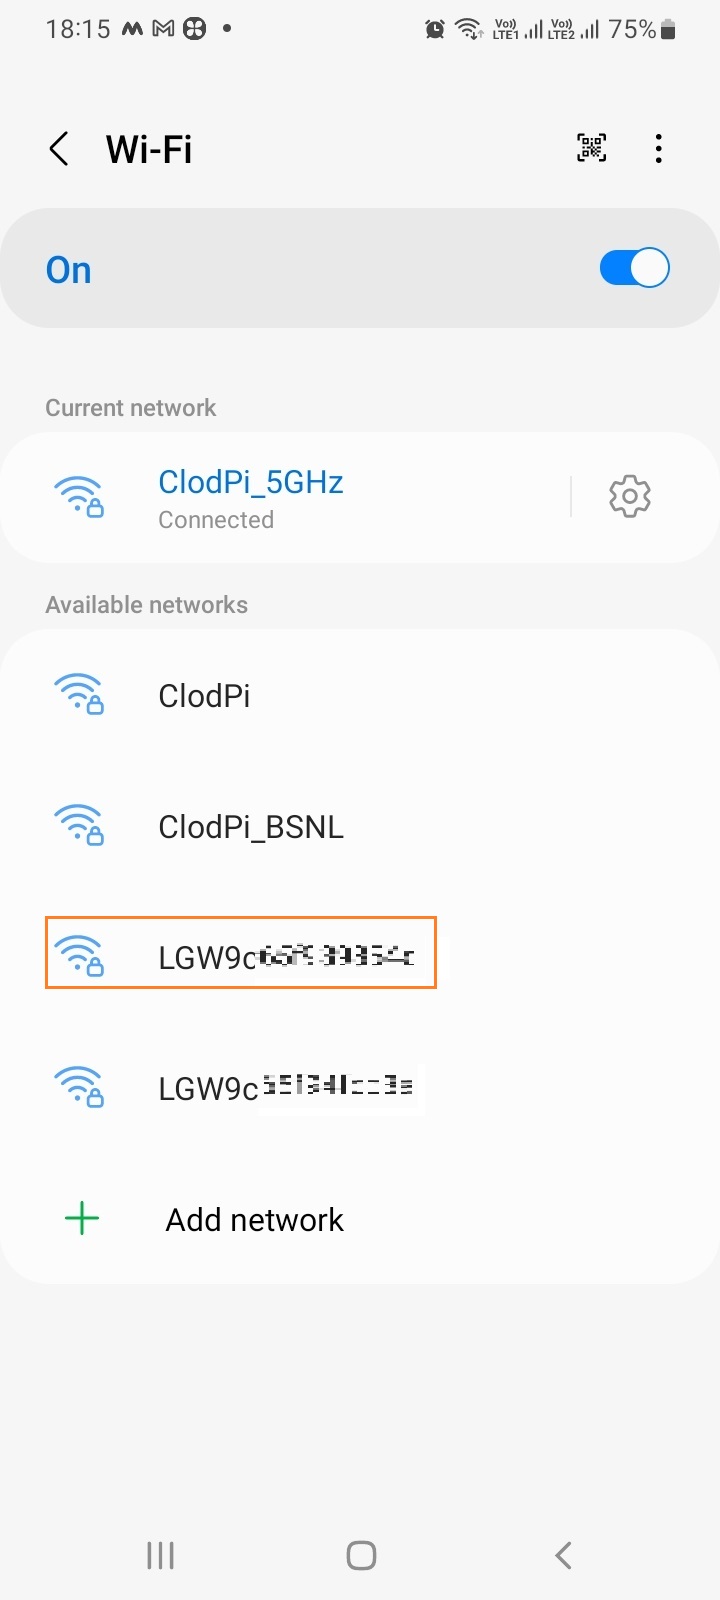
Go to WiFi options of smart mobile or Laptop
-
Available Wi-Fi networks > Select: LGW-0ccxxxxx
|
|
- Allow the smartphone / laptop to connect the Gateway WiFi.
Password: 87654321
This makes sure that your device WiFi is working and connected with your smartphone / laptop. Now we are good to Configure SIM details.
|
|
|
Default username: root
Password: pass1234
|
|
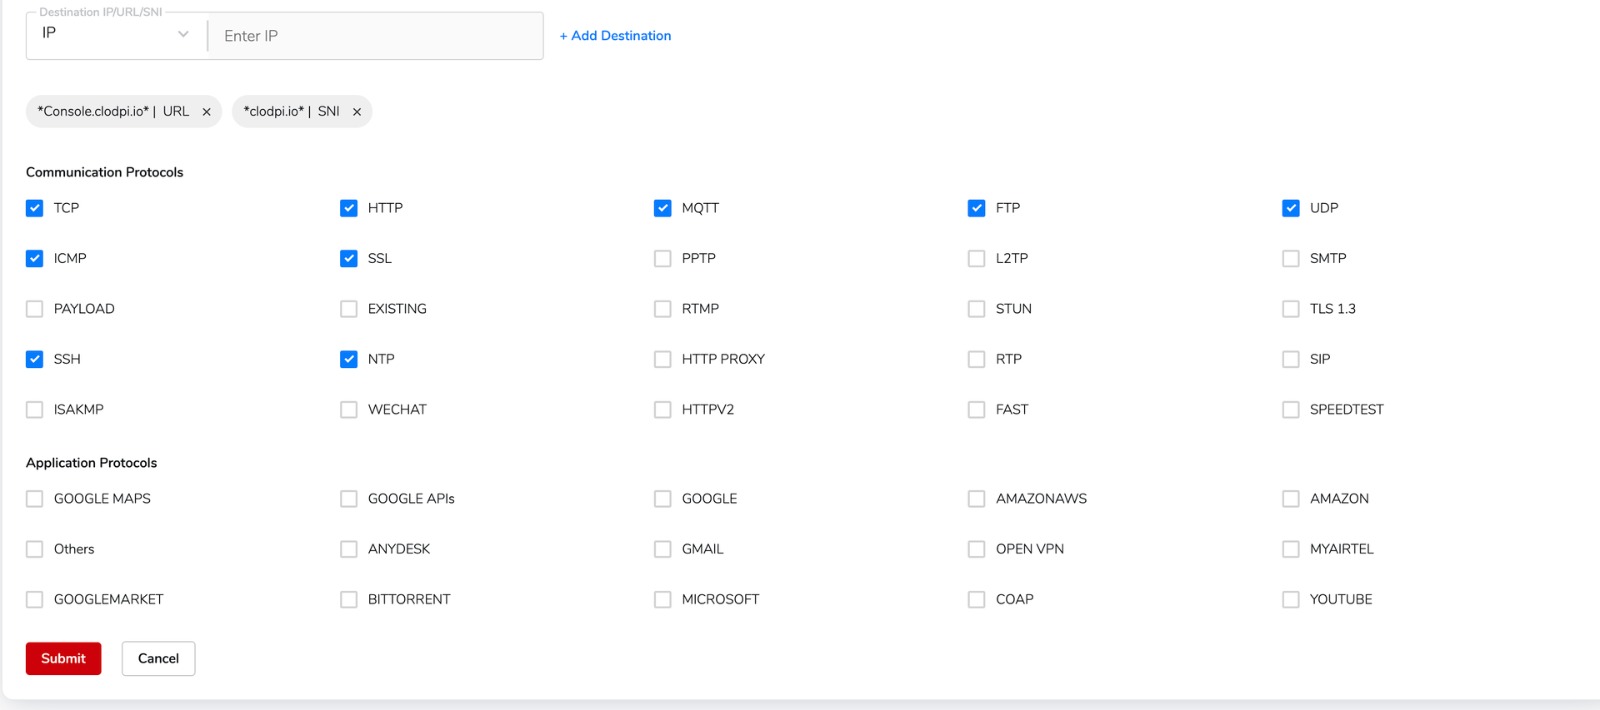
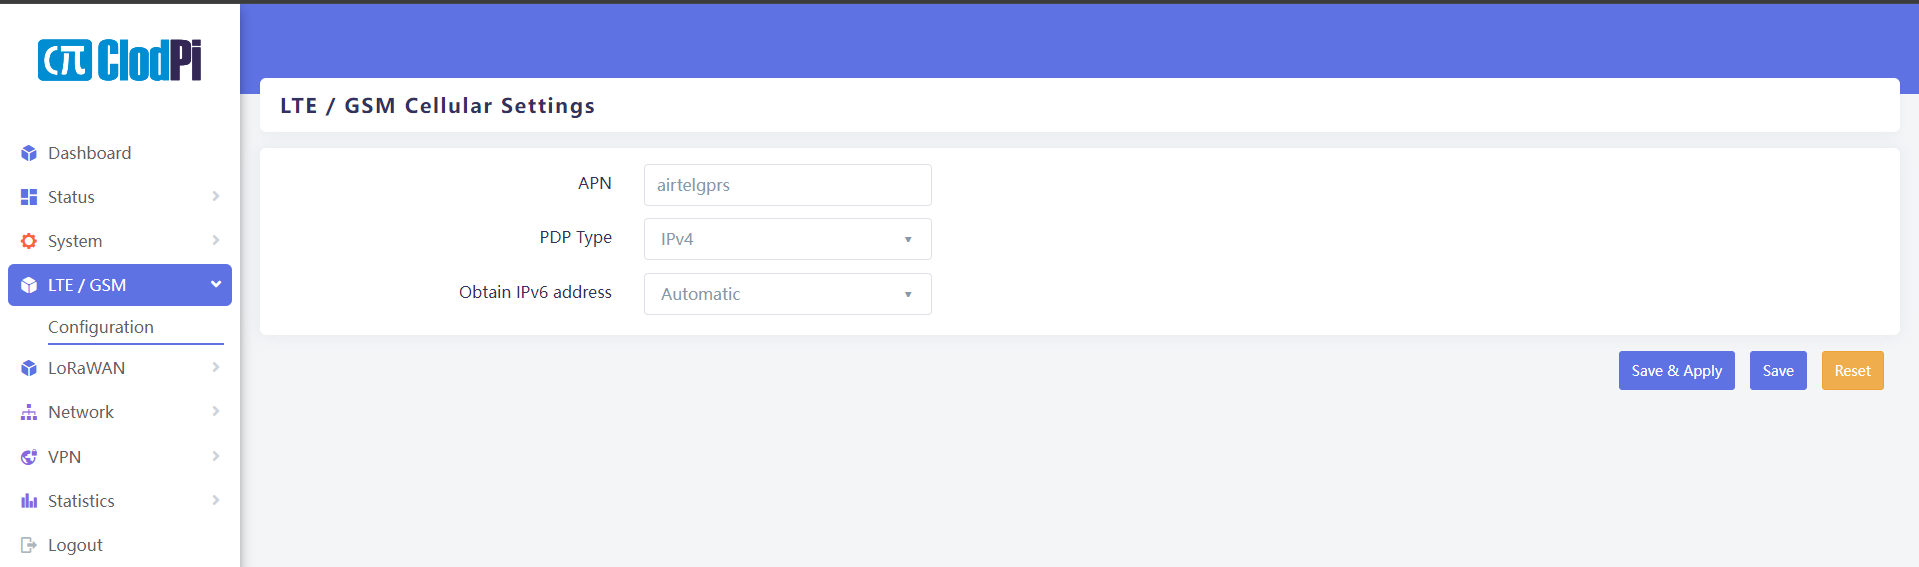
- Navigate to Menu > LTE/GSM > Configuration:
"LTE / GSM Cellular Settings" tab, enter / select values as mentioned below:
-
APN: enter APN details for your SIM service. Do not modify anything else in the “Cellular” section. (Example: If your SIM is of Airtel, enter “airtelgprs”. Similarly, Check with your SIM operator for APN details.)
-
PDP Type: select IPv4. (Note: Do not select other values (IPv6, IPv4/IPv6) from the dropdown.)
-
Obtain IPv6 address: Do not change the default value ‘Automatic’.
- Tap: Save&Apply
|
|
-
After a minute, navigate to WiFi option on your laptop / smartphone
-
Available Wi-Fi networks > Select: LGWxxxxxxxx
-
Allow the laptop/smartphone to connect to the Gateway WiFi. This makes sure that your device WiFi is working and connected with your smartphone.
Note: We are good to proceed with Gateway onboarding steps.
Safety Instructions:
- Make sure the area where you are performing the steps has no water / moisture or any other fluid nearby to the device.
- Make sure the SIM is clear of any moisture / fluid / dust.
- The screws on the PC Cover are tightened by applying appropriate torque / pressure on the screwdriver.
|
|
![[ClodPi Labs] Discussion and support forum](https://discuss.clodpi.io/uploads/default/original/1X/6046bbcd89d9c9db3896c6cd7b77c593de8d6386.png)